How To Manually Create A Credit Note
Scenarios:
You want to manually create a new credit note
This document assumes the following:
You have set up your activity on Enrolmy
How To Manually Create A Credit Note
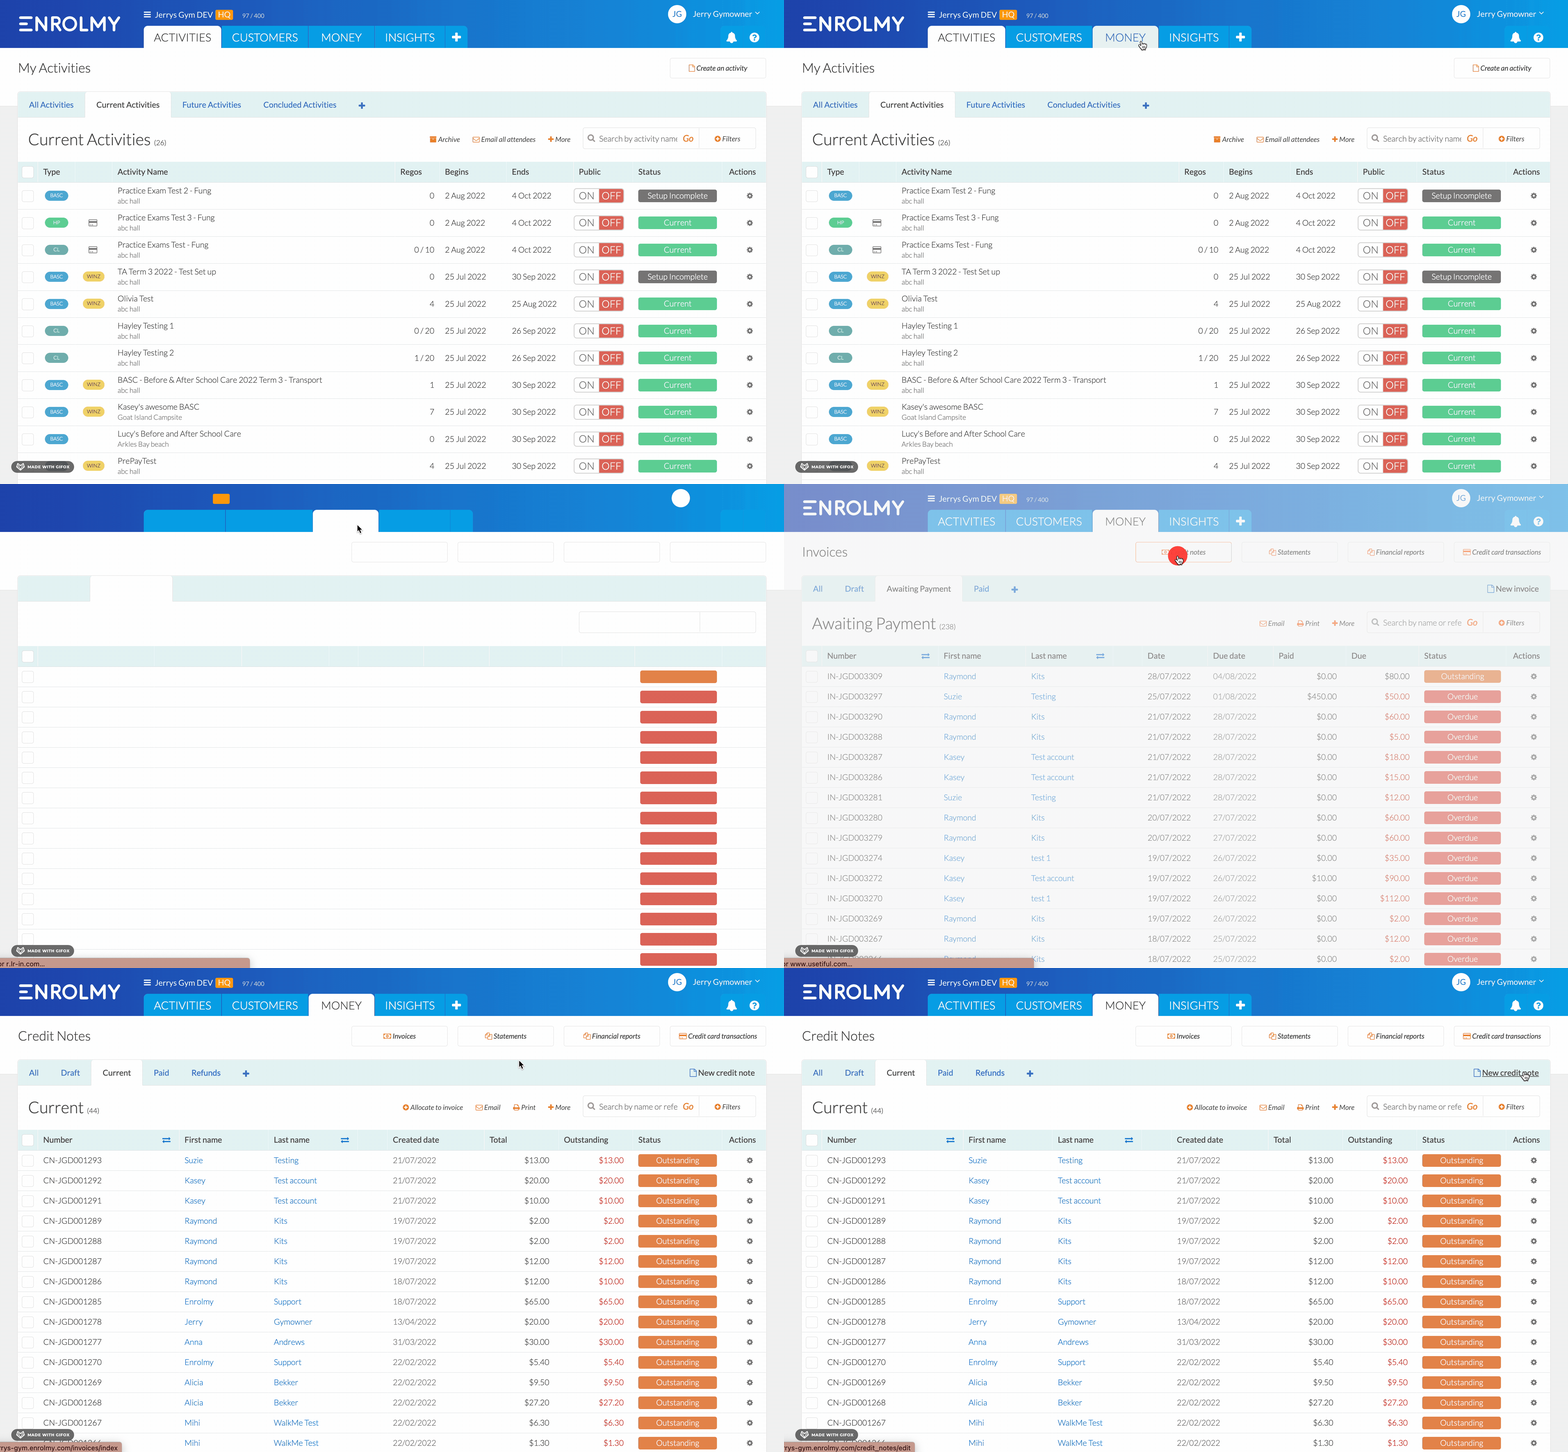
Navigate to the Money tab
Select Credit Notes
Select New Credit note

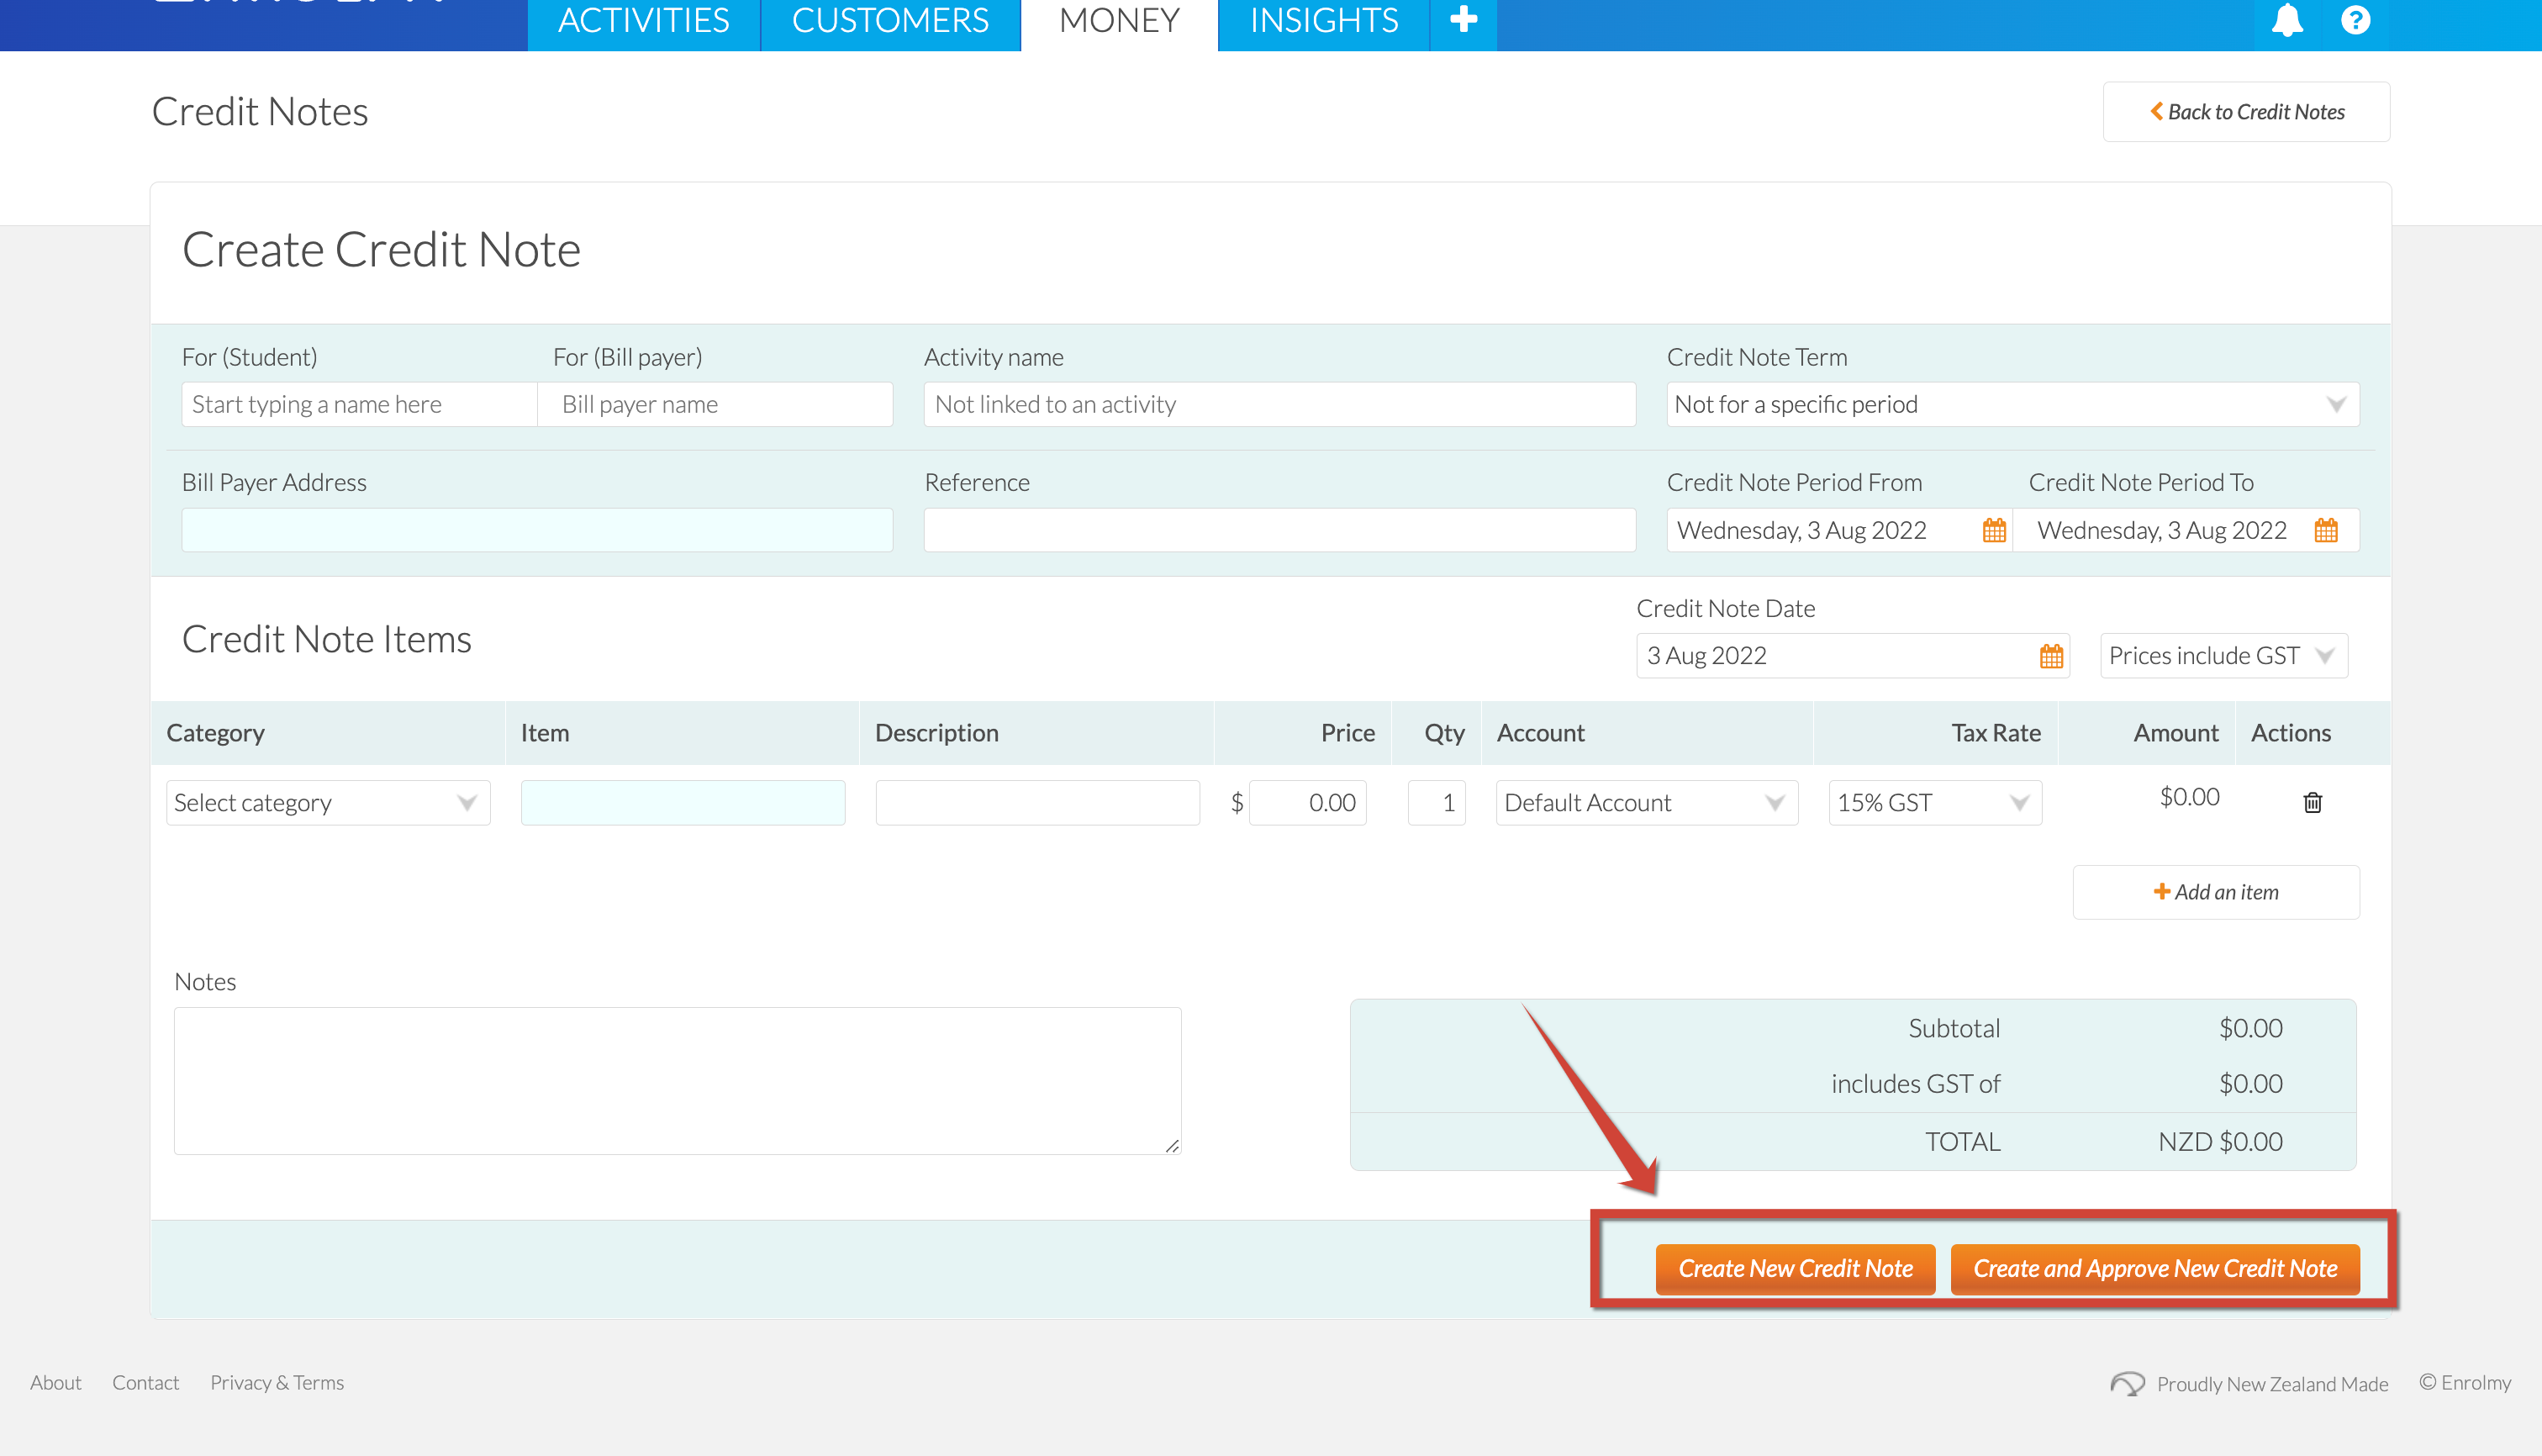
Please see below the information that you can enter in a manually created invoice:
Area | Information | Description |
|---|---|---|
General | For (Student) | Name of student the credit note is for |
For (Bill payer) | Name of Bill Payer the credit note is for | |
Activity Name | You can link an activity to ensure accurate tracking If no activity is linked, then it will remain as “Not linked to an activity“. | |
Credit Note Term | Term for when the credit note is applicable | |
Bill Payer Address | This will appear automatically once a Bill Payer has been selected | |
Reference | A mention or refer to | |
Credit Note Period From/To | Period the credit note is for | |
Credit Note Date | The date the credit note is created | |
Tax Rate | The % of tax | |
Invoice Items | Category/ Item/ Description | Categorisation of the line item |
Price | Credit associated | |
Qty | Quantity / how many | |
Account | Associate with an account for tracking purposes | |
Tax Rate | The % of tax | |
Amount | Total credit of line item (multiplied by quantity if more than 1) | |
Actions | Delete the line item if created in error | |
Add an Item | Add another line item | |
Notes | Additional area for further explanation |
4. Lastly, you can either:
Create New Draft Credit note → will be saved as a draft where further editing can be completed
Create and Approve New credit Note → will be approved straight away, and no further changes can be made

Congratulations! You now understand how to manually create a credit note!
Last Updated:
