How To Manually Create An Invoice
Scenarios:
You want to create a new invoice manually
This document assumes the following:
You have set up your activity on Enrolmy
How To Manually Create An Invoice
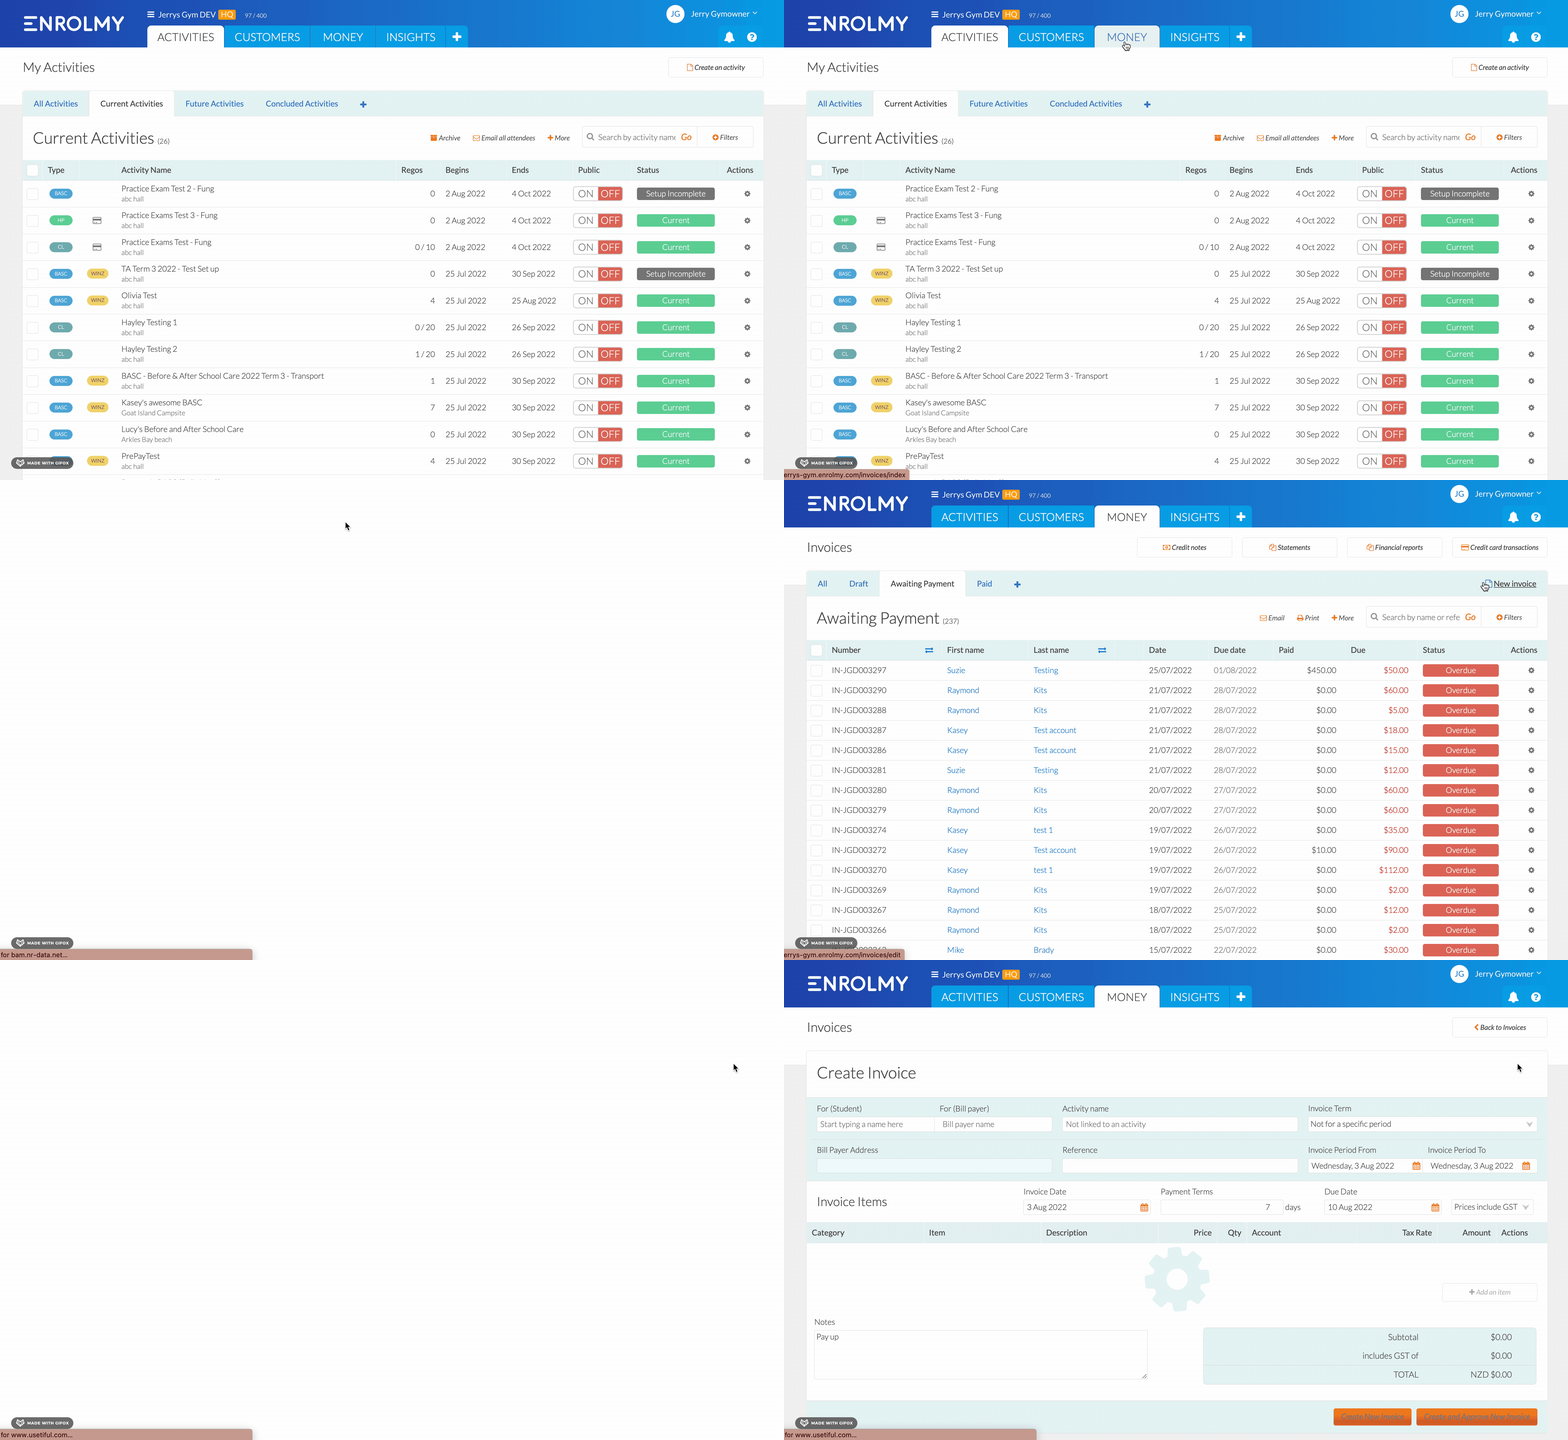
Navigate to the Money tab
Select New Invoice

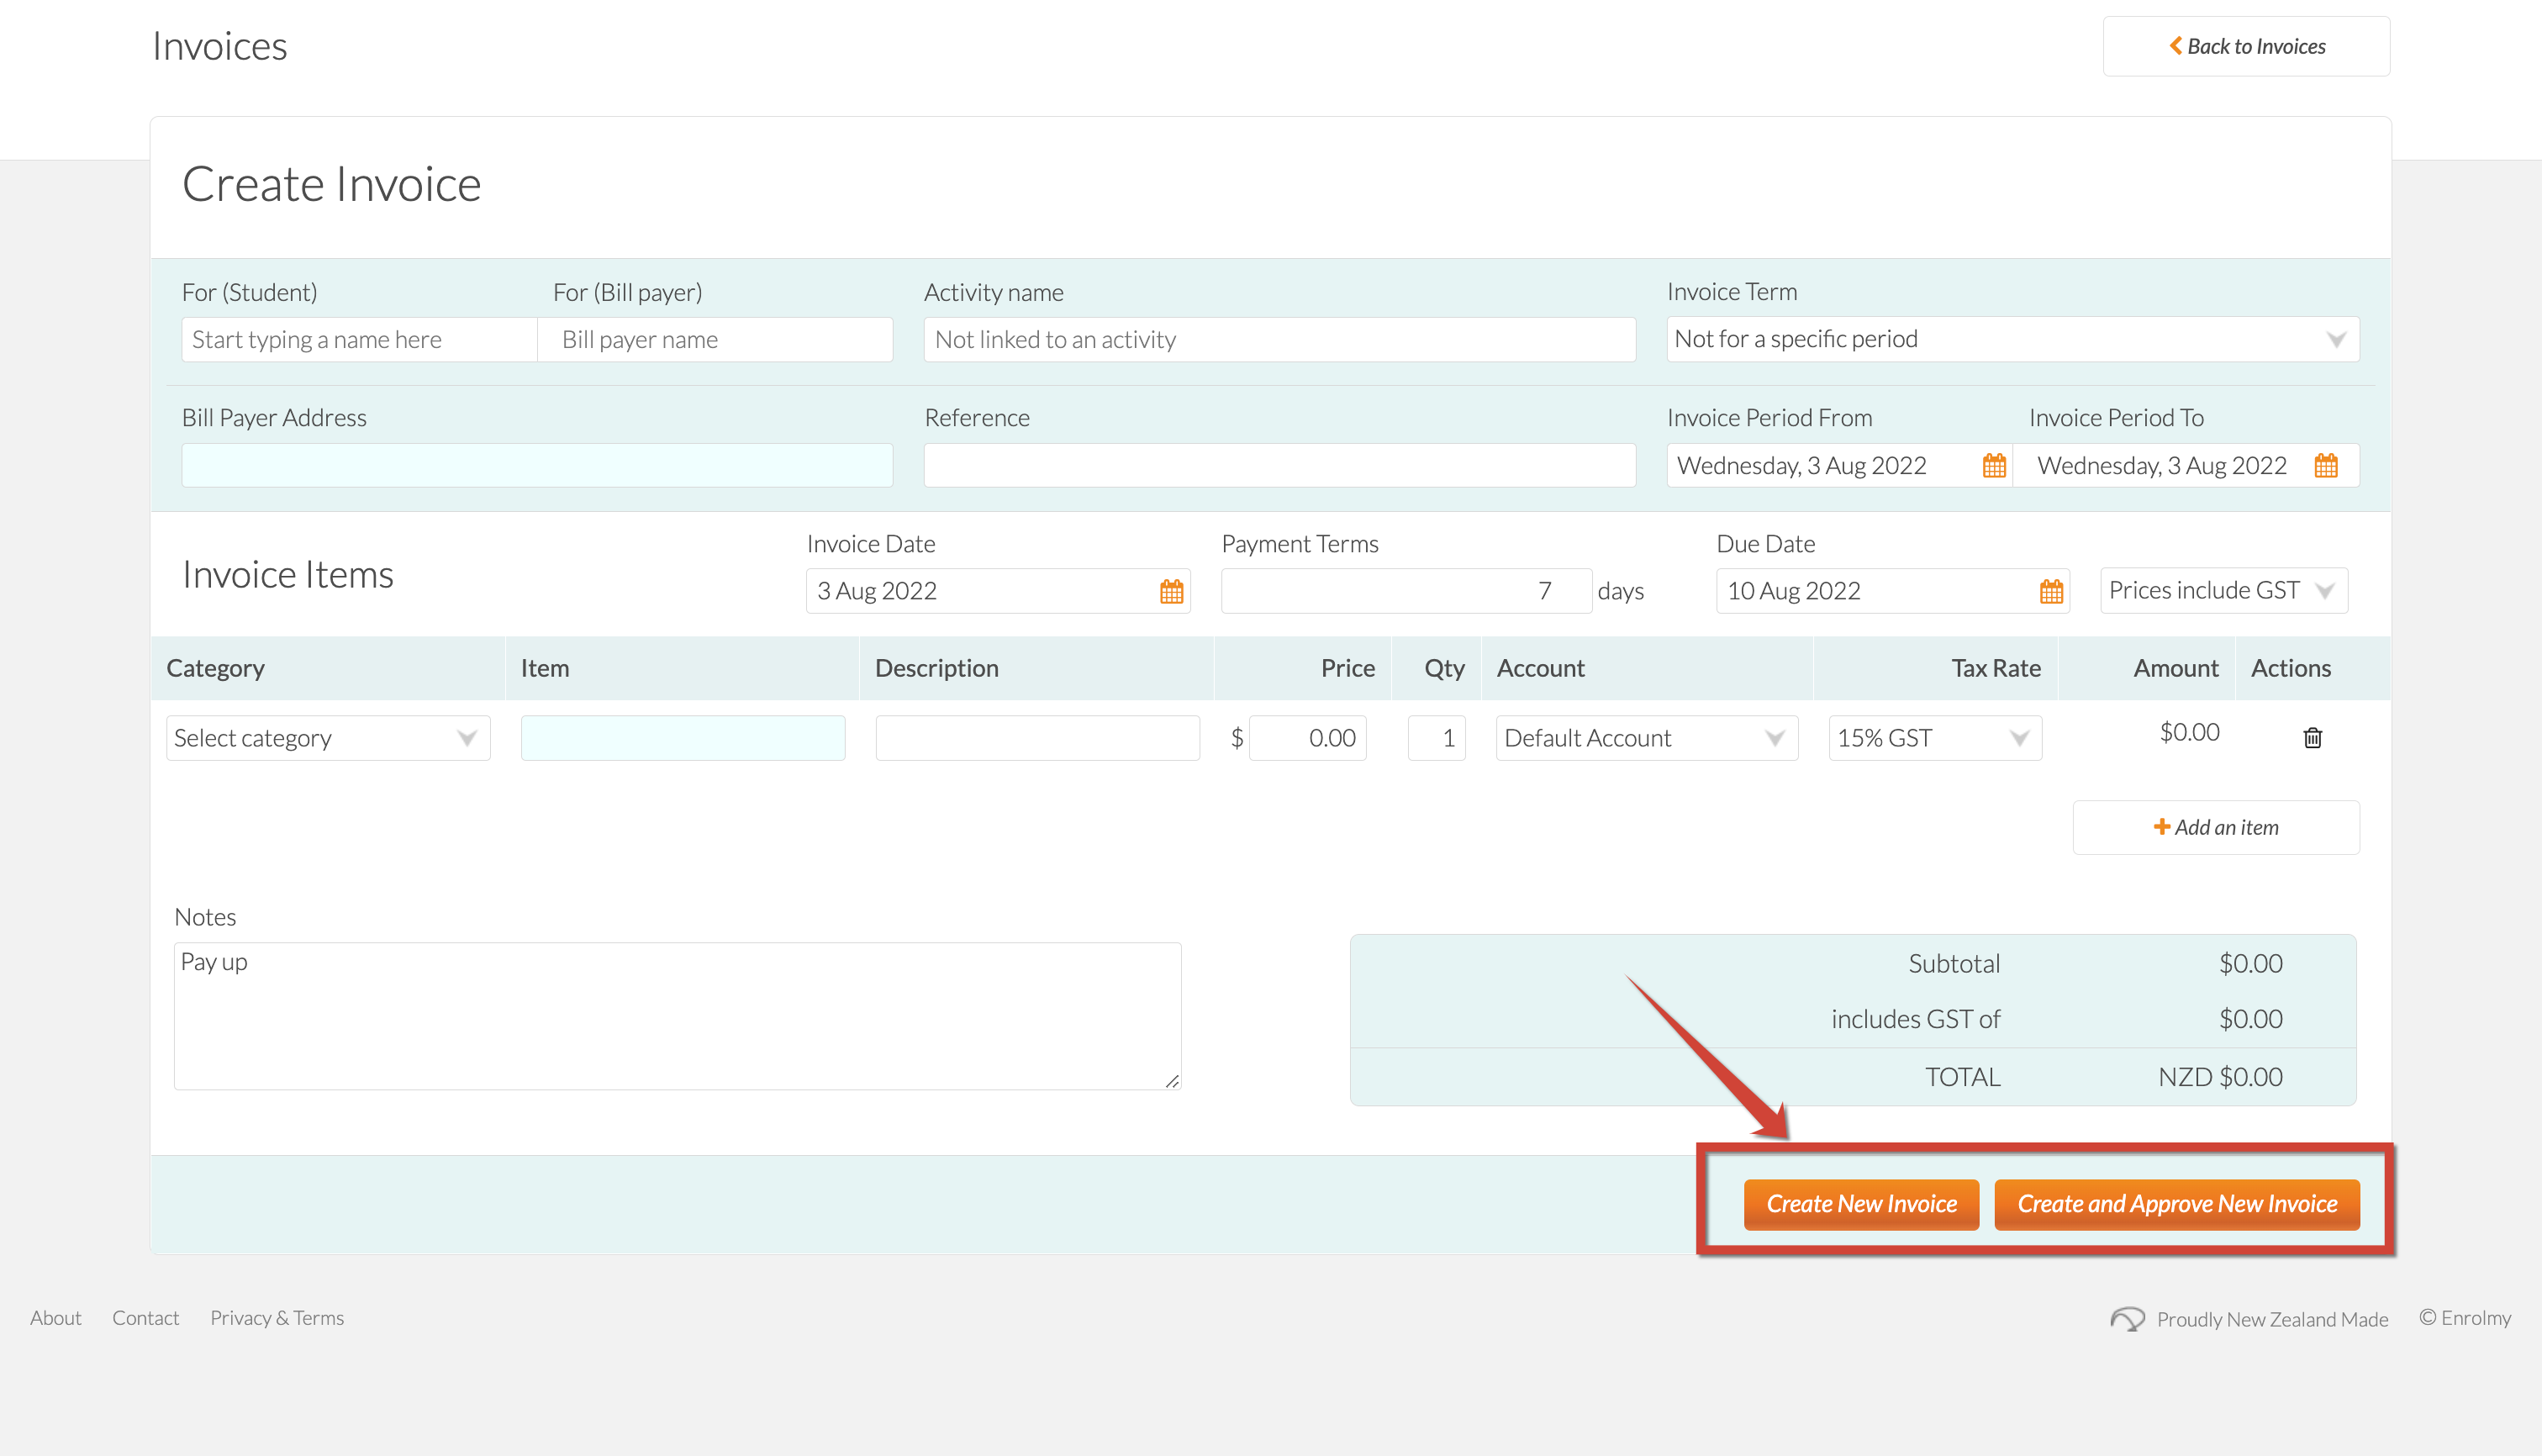
3. Please see below the information that you can enter into a manually created invoice:
Area | Information | Description |
|---|---|---|
General | For (Student) | Name of student the invoice is for |
For (Bill payer) | Name of Bill Payer the invoice is for | |
Activity Name | You can link an activity to ensure accurate tracking If no activity is linked, then it will remain as “Not linked to an activity“. | |
Invoice Term | Term for when the invoice is applicable | |
Bill Payer Address | This will appear automatically once a bill payer has been selected | |
Reference | A mention or refer to | |
Invoice Period From/To | Period the invoice is for | |
Invoice Date | The date the invoice is created | |
Payment Terms | Expectation of when the invoice should be paid by | |
Due Date | When the invoice is due | |
Tax Rate | The % of tax | |
Invoice Items | Category/ Item/ Description | Categorisation of the line item |
Price | Cost associated You can enter a negative amount in order to reference a discount of some sort | |
Qty | Quantity / how many | |
Account | Associate with an account for tracking purposes | |
Tax Rate | The % of tax | |
Amount | Total cost of line item (multiplied by Qty if more than 1) | |
Actions | Delete the line item if created in error | |
Add an Item | Add another line item | |
Notes | Additional area for further explanation |
4. Lastly, you can either:
Create New Draft Invoice → will be saved as a draft where further editing can be completed
Create and Approve New Invoice → will be approved straight away, and no further changes can be made

Congratulations! You now understand how to create an invoice manually!
Last Updated:
