How To Create, Edit, Delete or Apply Roster Templates
Scenarios:
You are using Enrolmy’s Rostering feature
You want to know how to create, edit, delete and apply a roster templates.
This document assumes the following:
You are an active Enrolmy user
You have already set up tags for rostering
What Are Roster Templates
A roster template is a set of saved shifts that can be applied across the full duration of the activity. Roster Templates allow you to roster weeks or even months in advance. Once created and applied to activities, managing and communicating shifts can be sorted in a matter of clicks.
How To Create A Roster Template
You can create a roster template in two areas, within the Dashboard or Settings.
Create A Roster Template In The Dashboard
Select Roster and then Dashboard
Select Create Roster Template
.png?inst-v=8926a06b-5d54-49ca-9b5c-025458cee6b8)
When the pop-up appears, add the roster template name
Select approval period
Set several staff and position(s) needed for the roster
Set a start time (in 24-hour time format)
Set an end time (in 24-hour time format)
Select Submit
.png?inst-v=8926a06b-5d54-49ca-9b5c-025458cee6b8)
Create A Roster Template In Settings
Select Roster, then Settings, then Roster Templates
Choose Action and then +New Roster Template
.png?inst-v=8926a06b-5d54-49ca-9b5c-025458cee6b8)
Input the roster template name
Choose the approval period of this template
Set several staff and position(s) needed for the roster
Set a start time (in 24-hour time format)
Set an end time (in 24-hour time format)
Select Create or Create & Create Another to save.
.png?inst-v=8926a06b-5d54-49ca-9b5c-025458cee6b8)
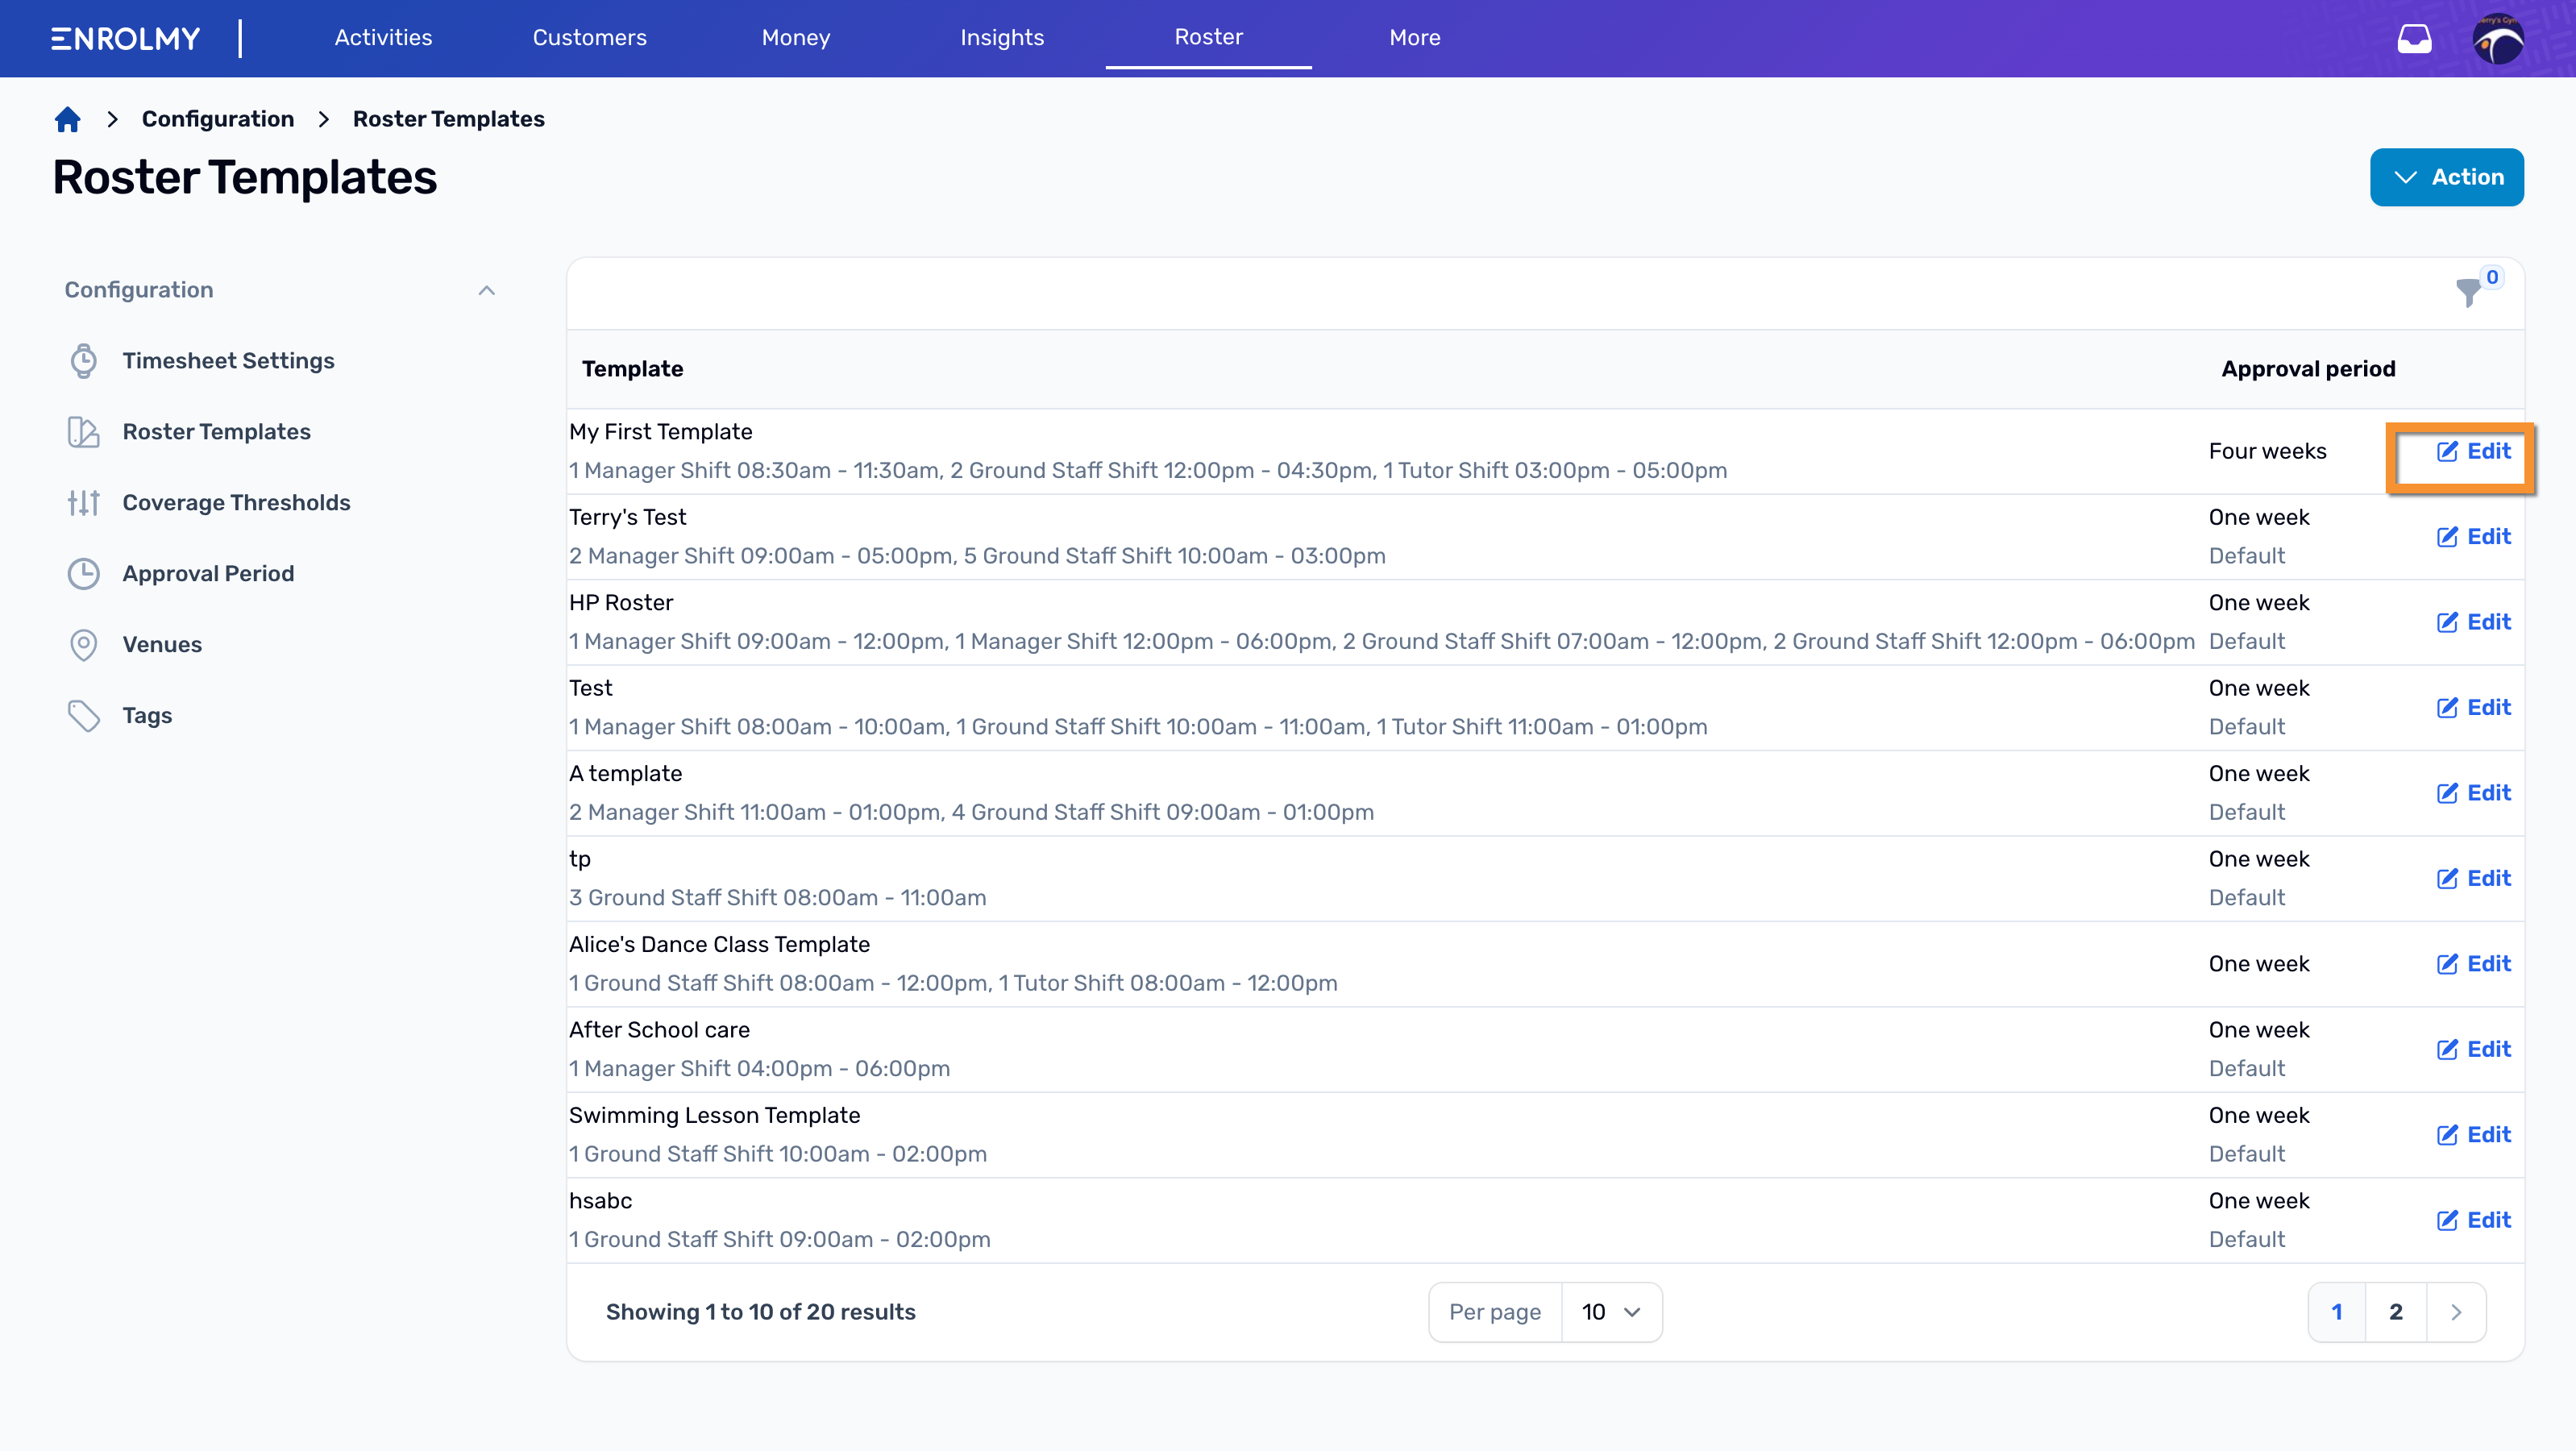
How To Edit Roster Templates
From the menu, select Roster and then Settings.
Choose Roster Templates
.png?inst-v=8926a06b-5d54-49ca-9b5c-025458cee6b8)
Scroll across the screen to view the options to Edit or Delete a template
Select Edit beside the template you want to update
Make the necessary changes as needed. You should be able to:
Change template name
Add or reduce the number of positions required
Add or reduce shifts
Change start and/or end time
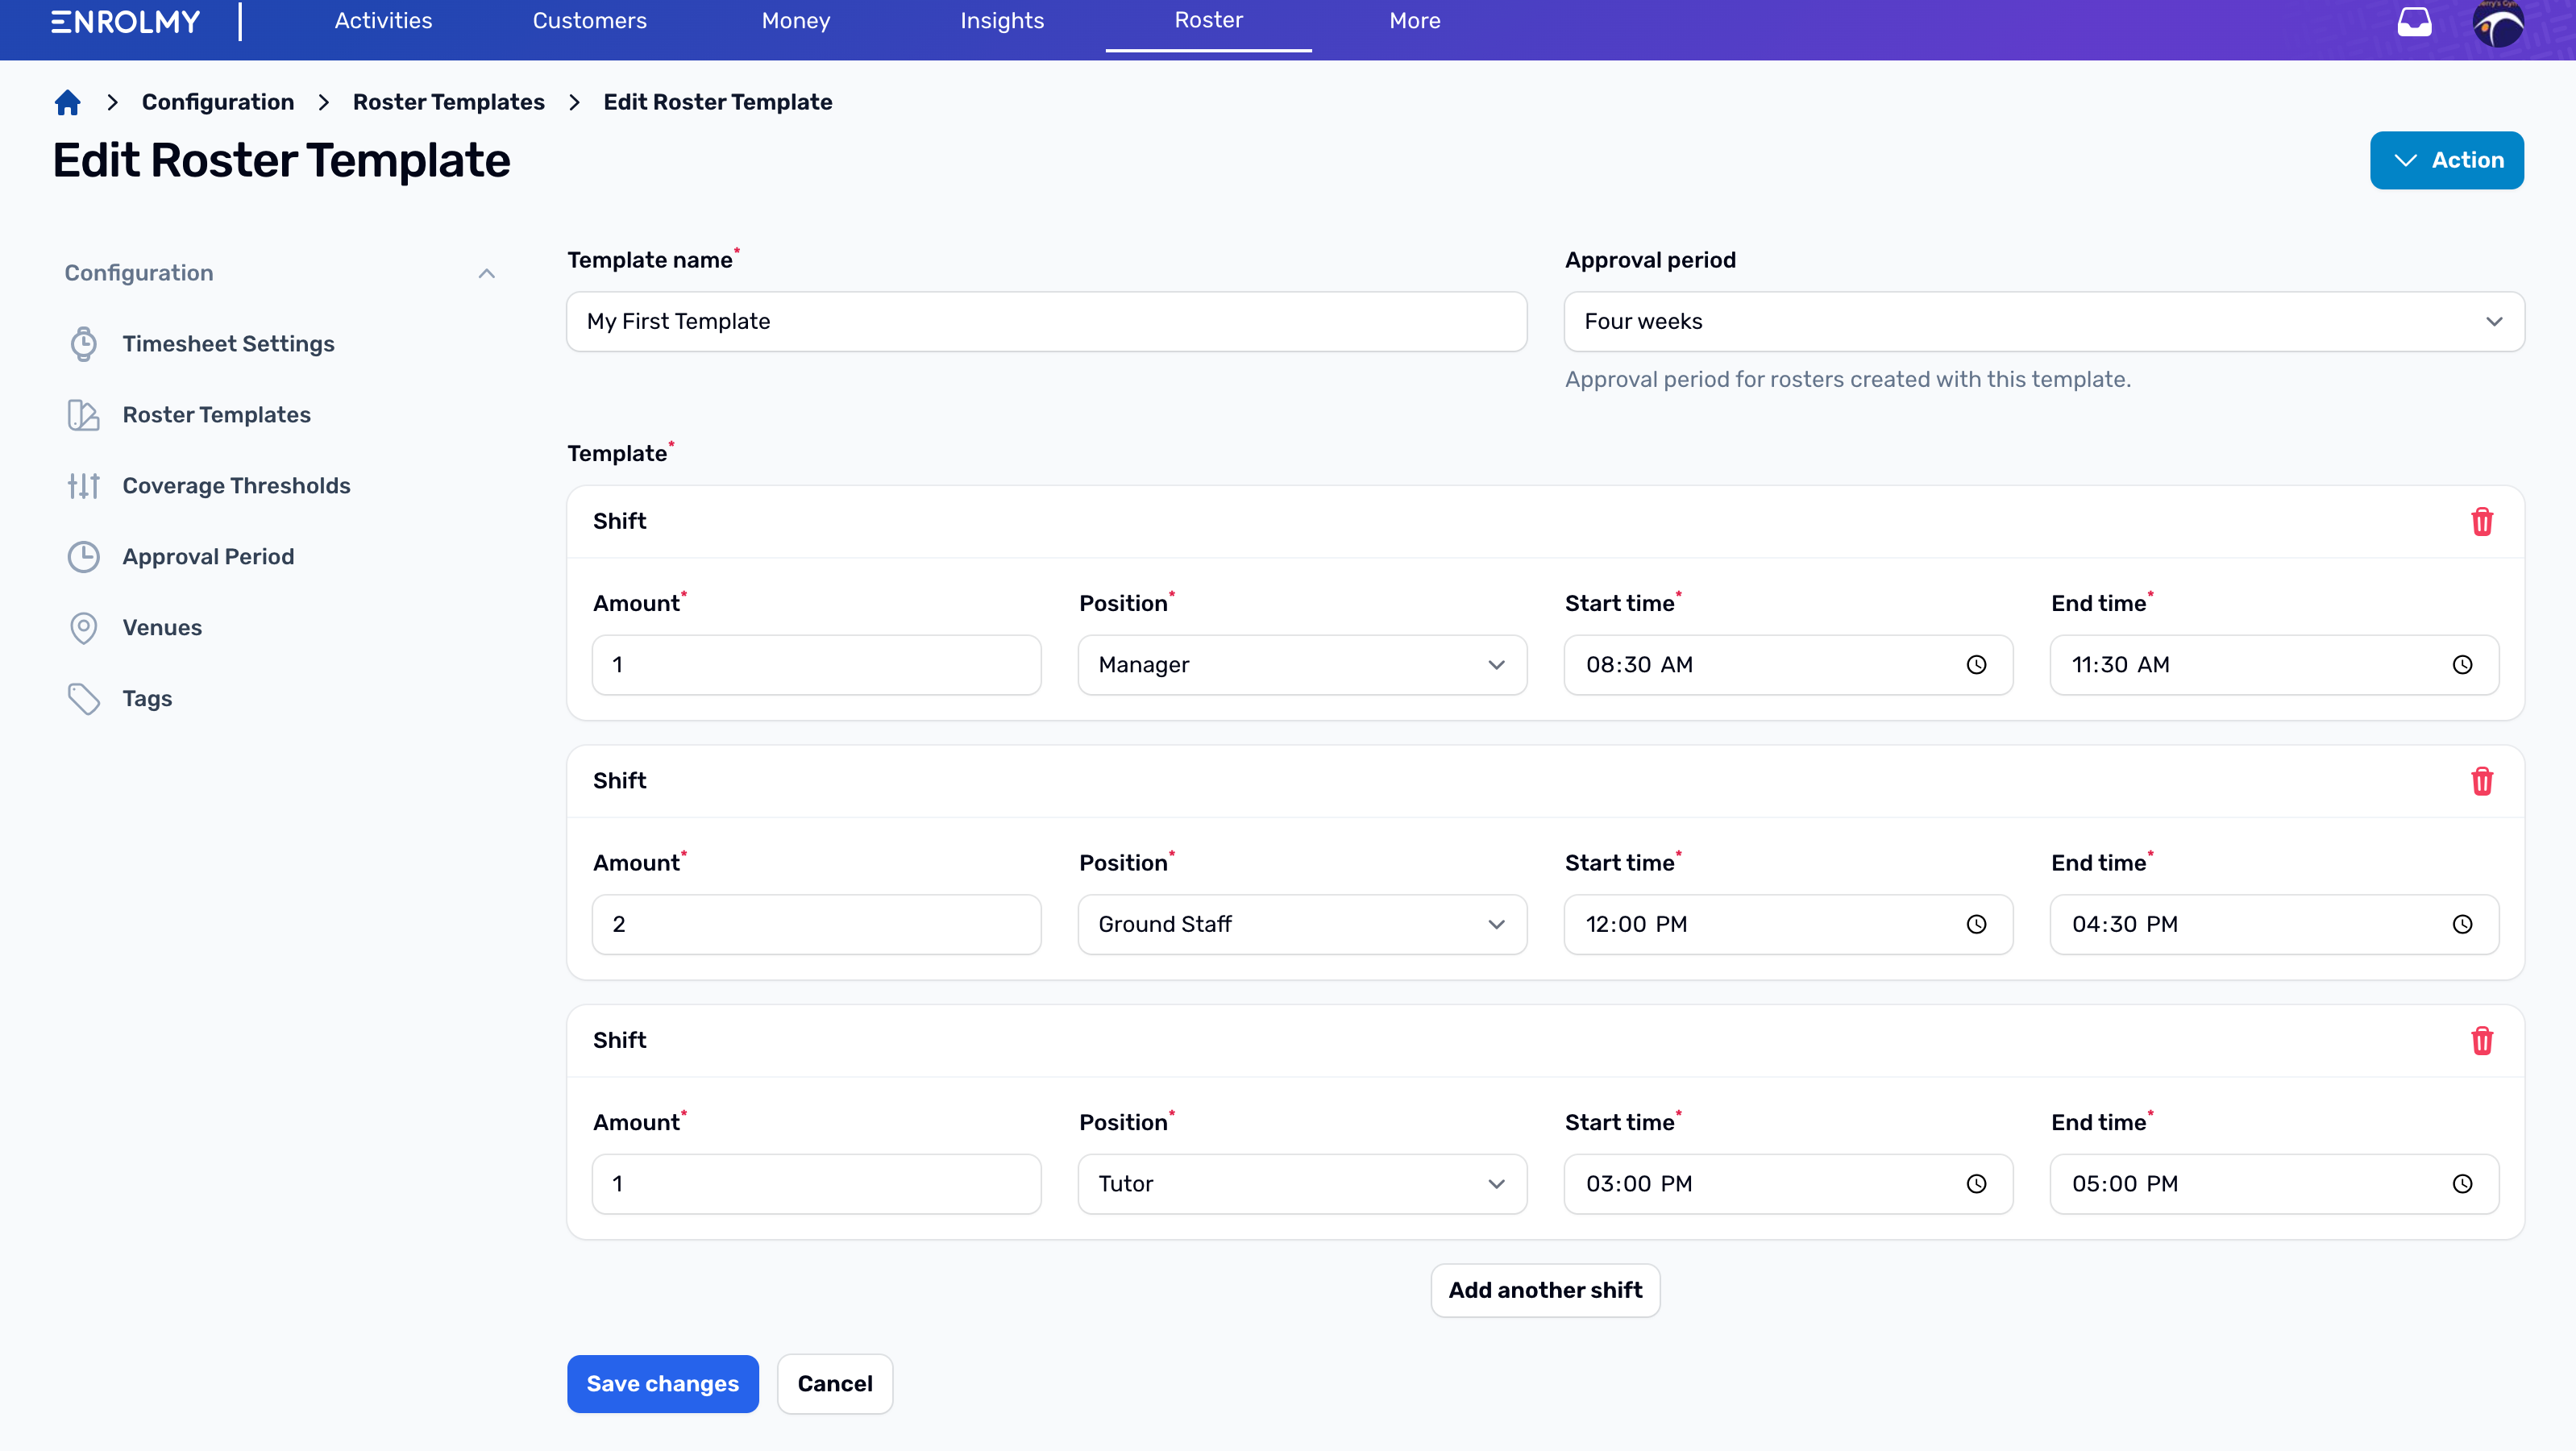
Select Save changes
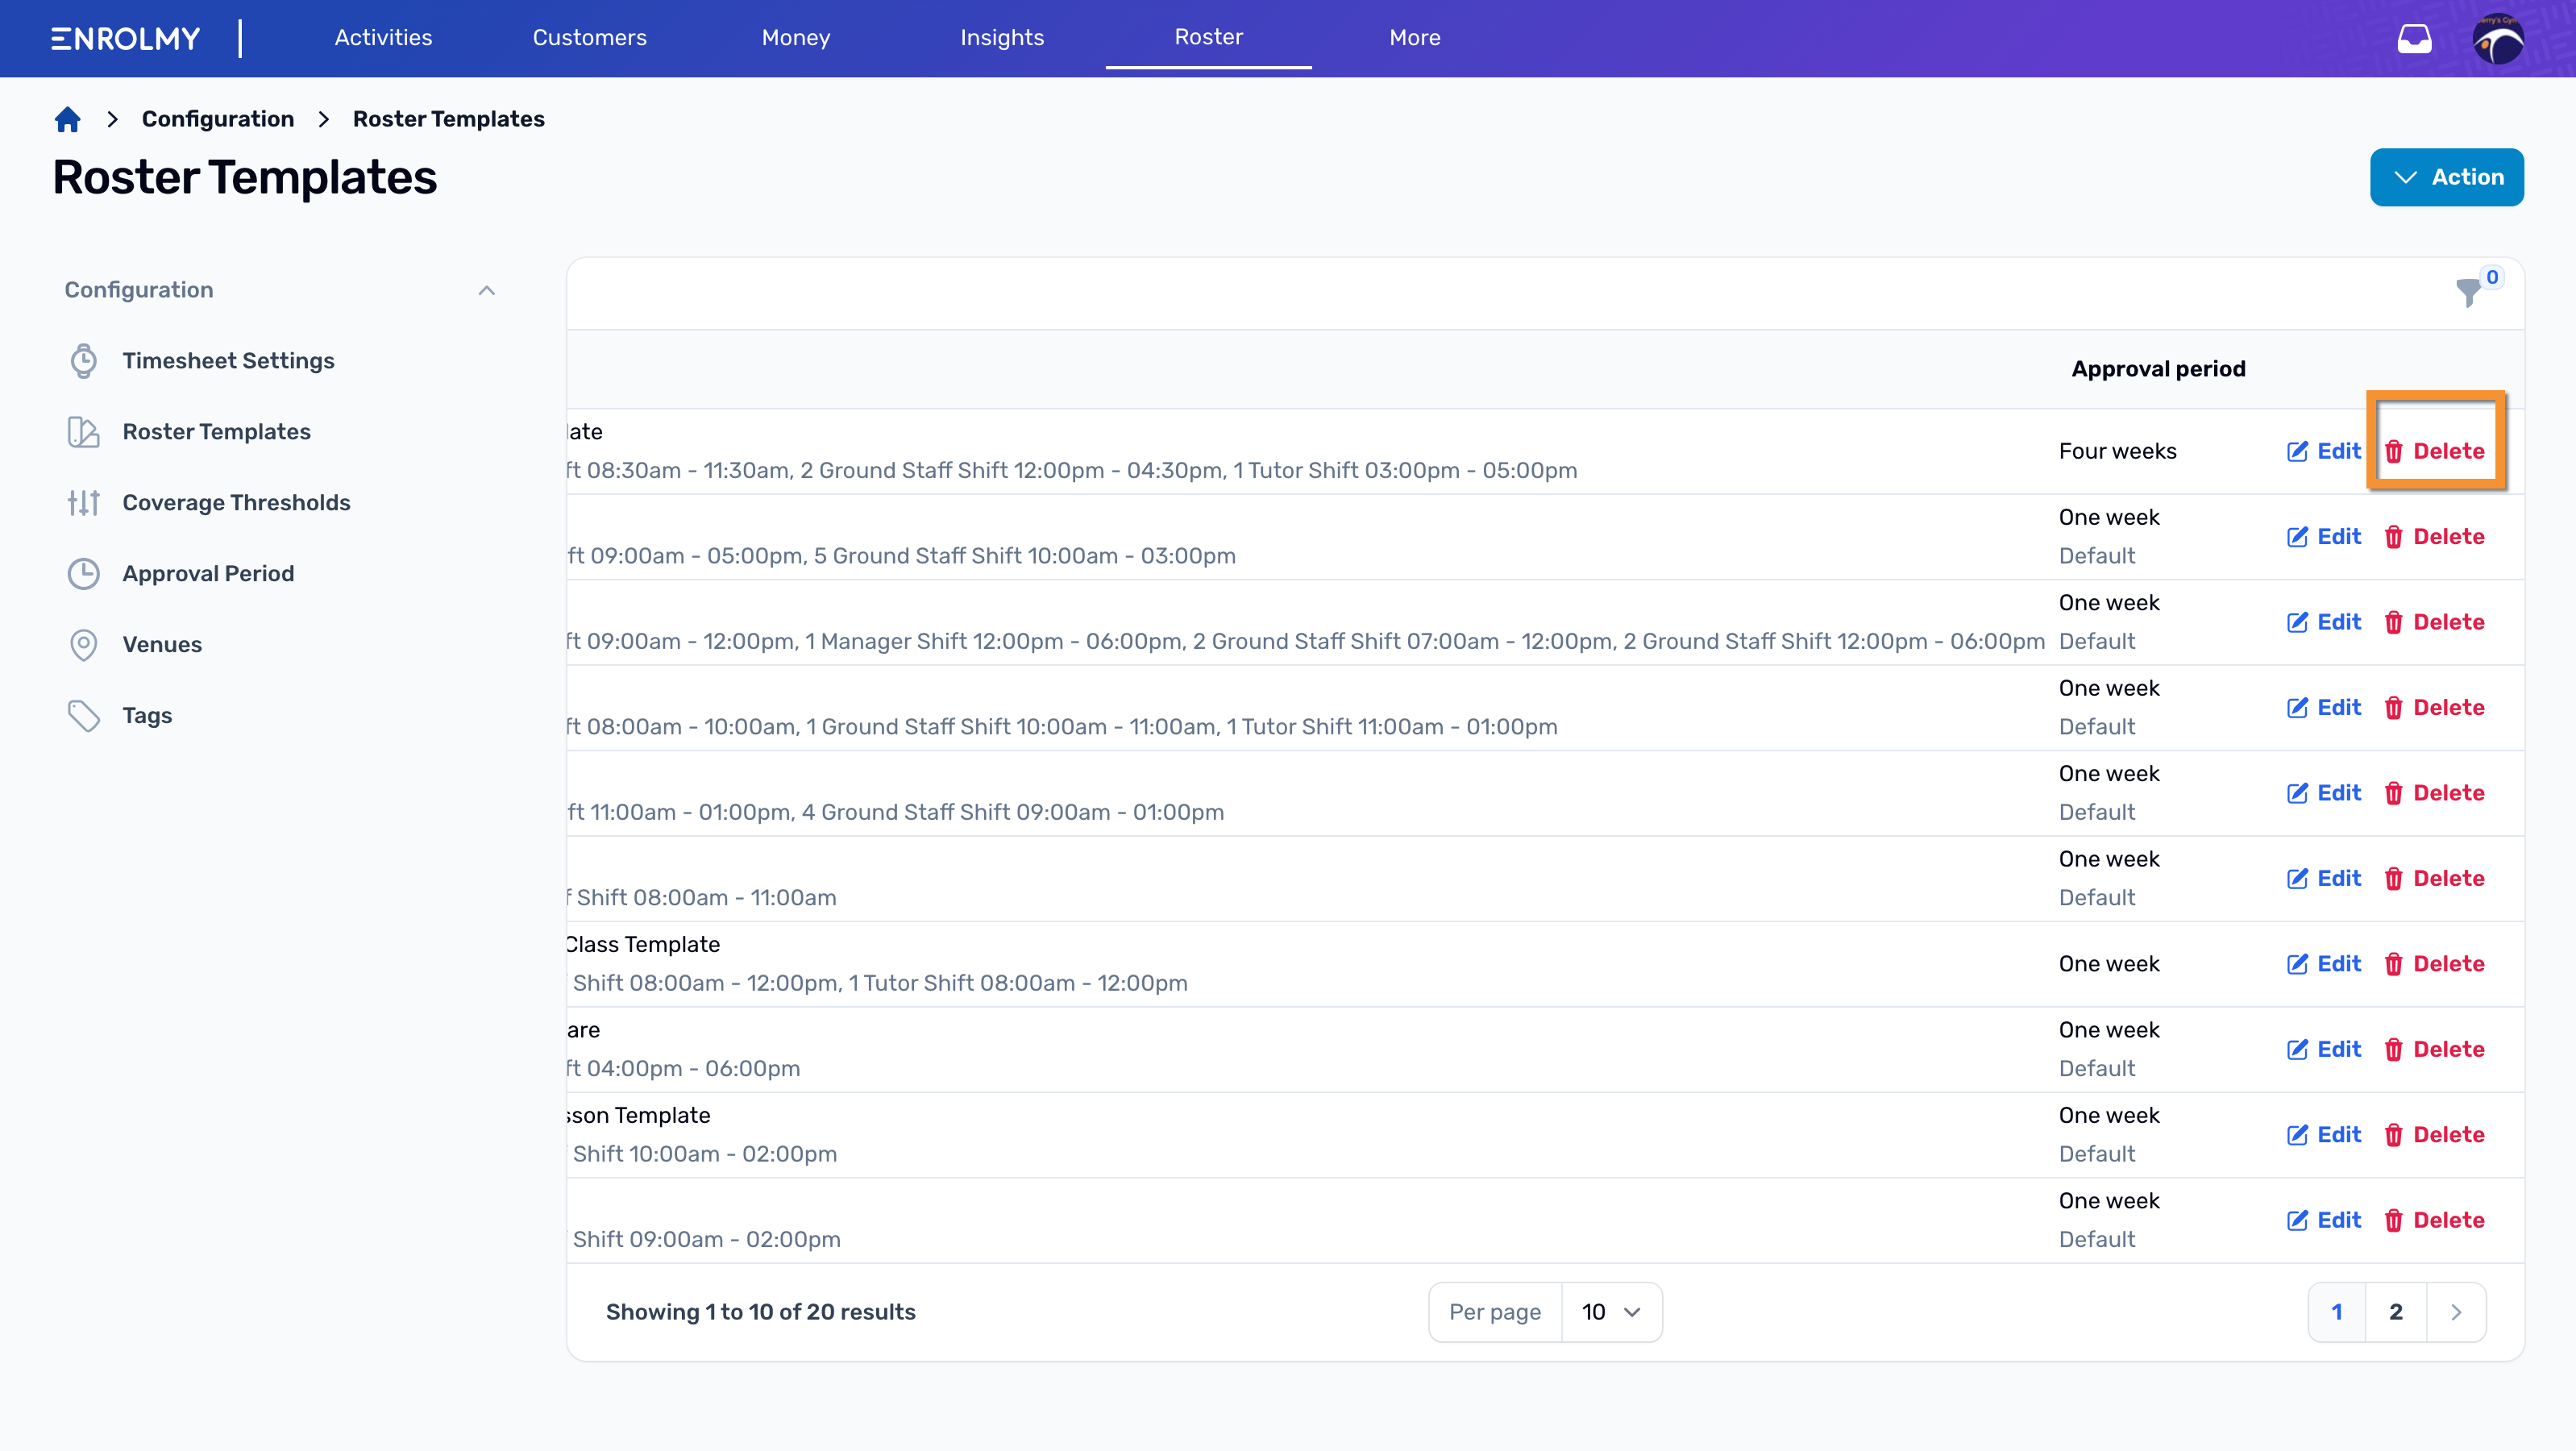
How To Delete Roster Templates
From the menu, select Roster and then Settings
Choose Roster Templates
Scroll across the screen to view the options to Edit or Delete a template
Select Delete beside the template you want to update
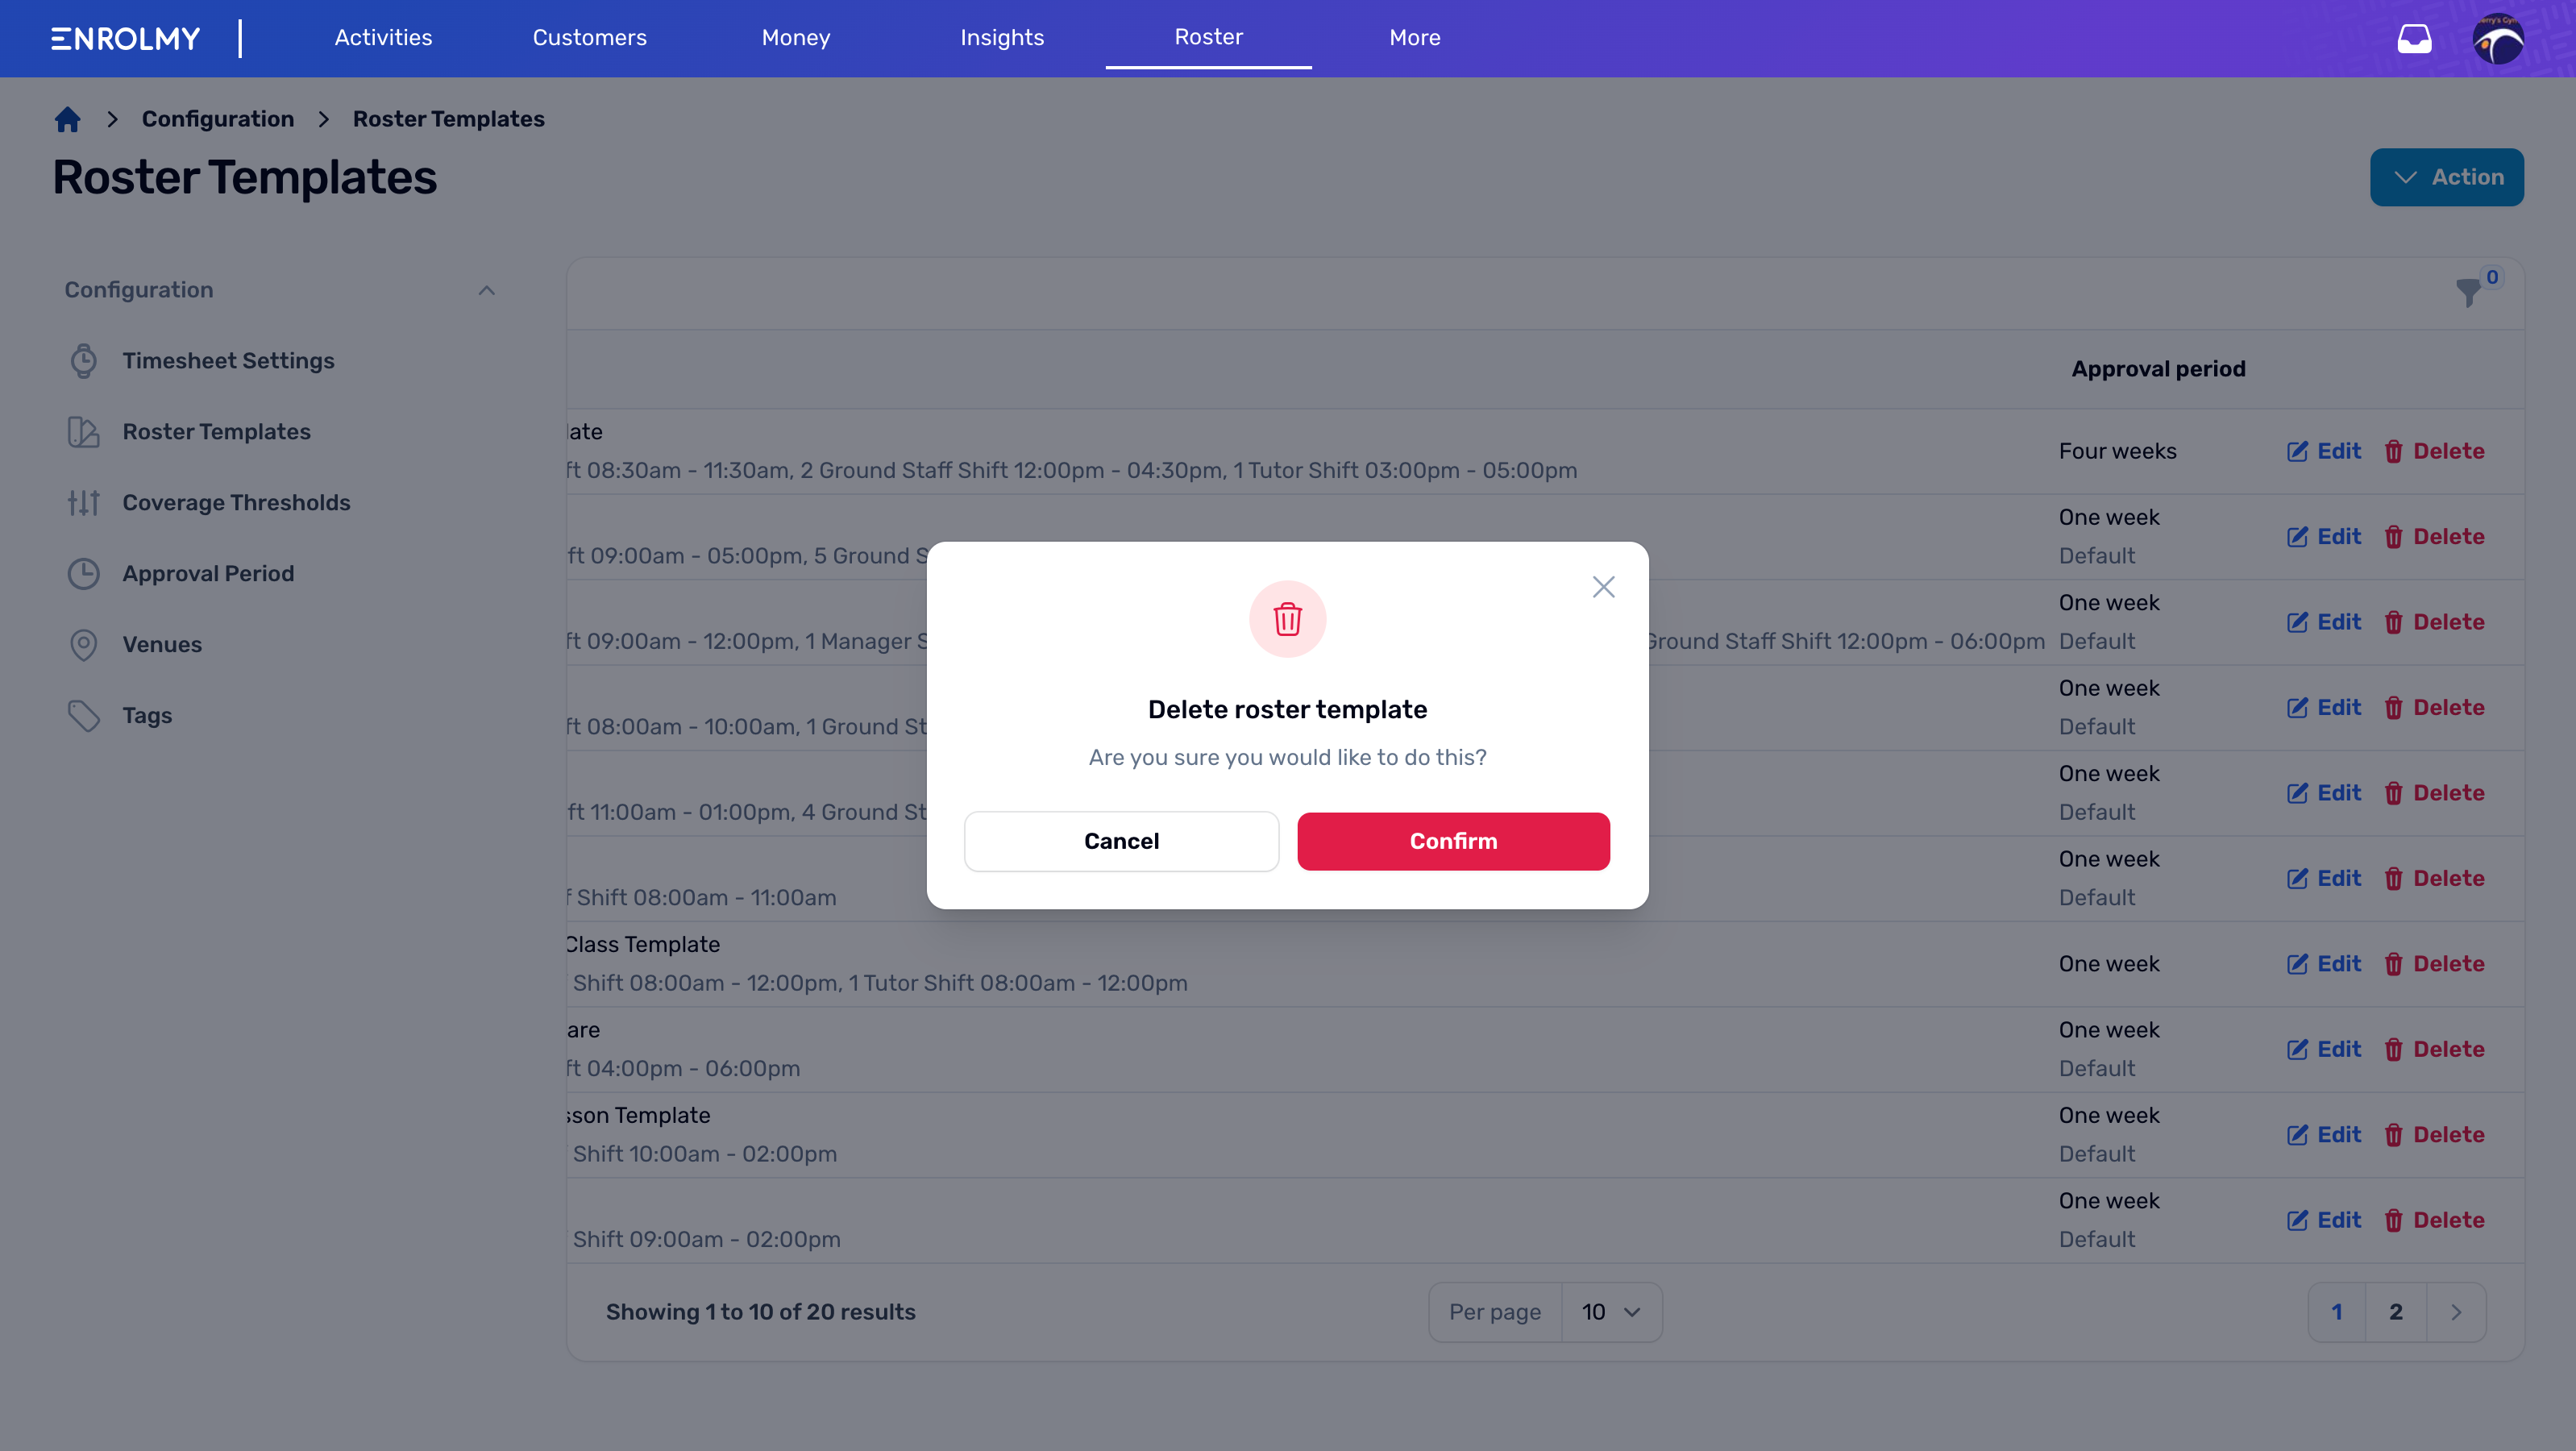
Choose Confirm
How To Apply A Roster Template
A Roster Template can be applied within the Dashboard and Activities areas. Both processes are the same.
https://vimeo.com/915400859?share=copySelect Roster from the menu, and choose Dashboard or Activities
Choose Apply Template next to the activity that you wish to set up a roster for
.png?inst-v=8926a06b-5d54-49ca-9b5c-025458cee6b8)
Select one of your already created roster templates from the drop-down list.
.png?inst-v=8926a06b-5d54-49ca-9b5c-025458cee6b8)
Choose the approval period timeframe from the drop-down list of options then select Next
.png?inst-v=8926a06b-5d54-49ca-9b5c-025458cee6b8)
Now you can assign specific staff to shifts. Select the Staff Assigned drop-down to choose the team member to assign to this shift.
If a staff member’s name is not visible in the drop-down list, this will be because this staff does not have that position tag assigned to them. To ensure a staff member can be assigned shifts, they must be tagged with position or role tags. See how to assign staff tags here.
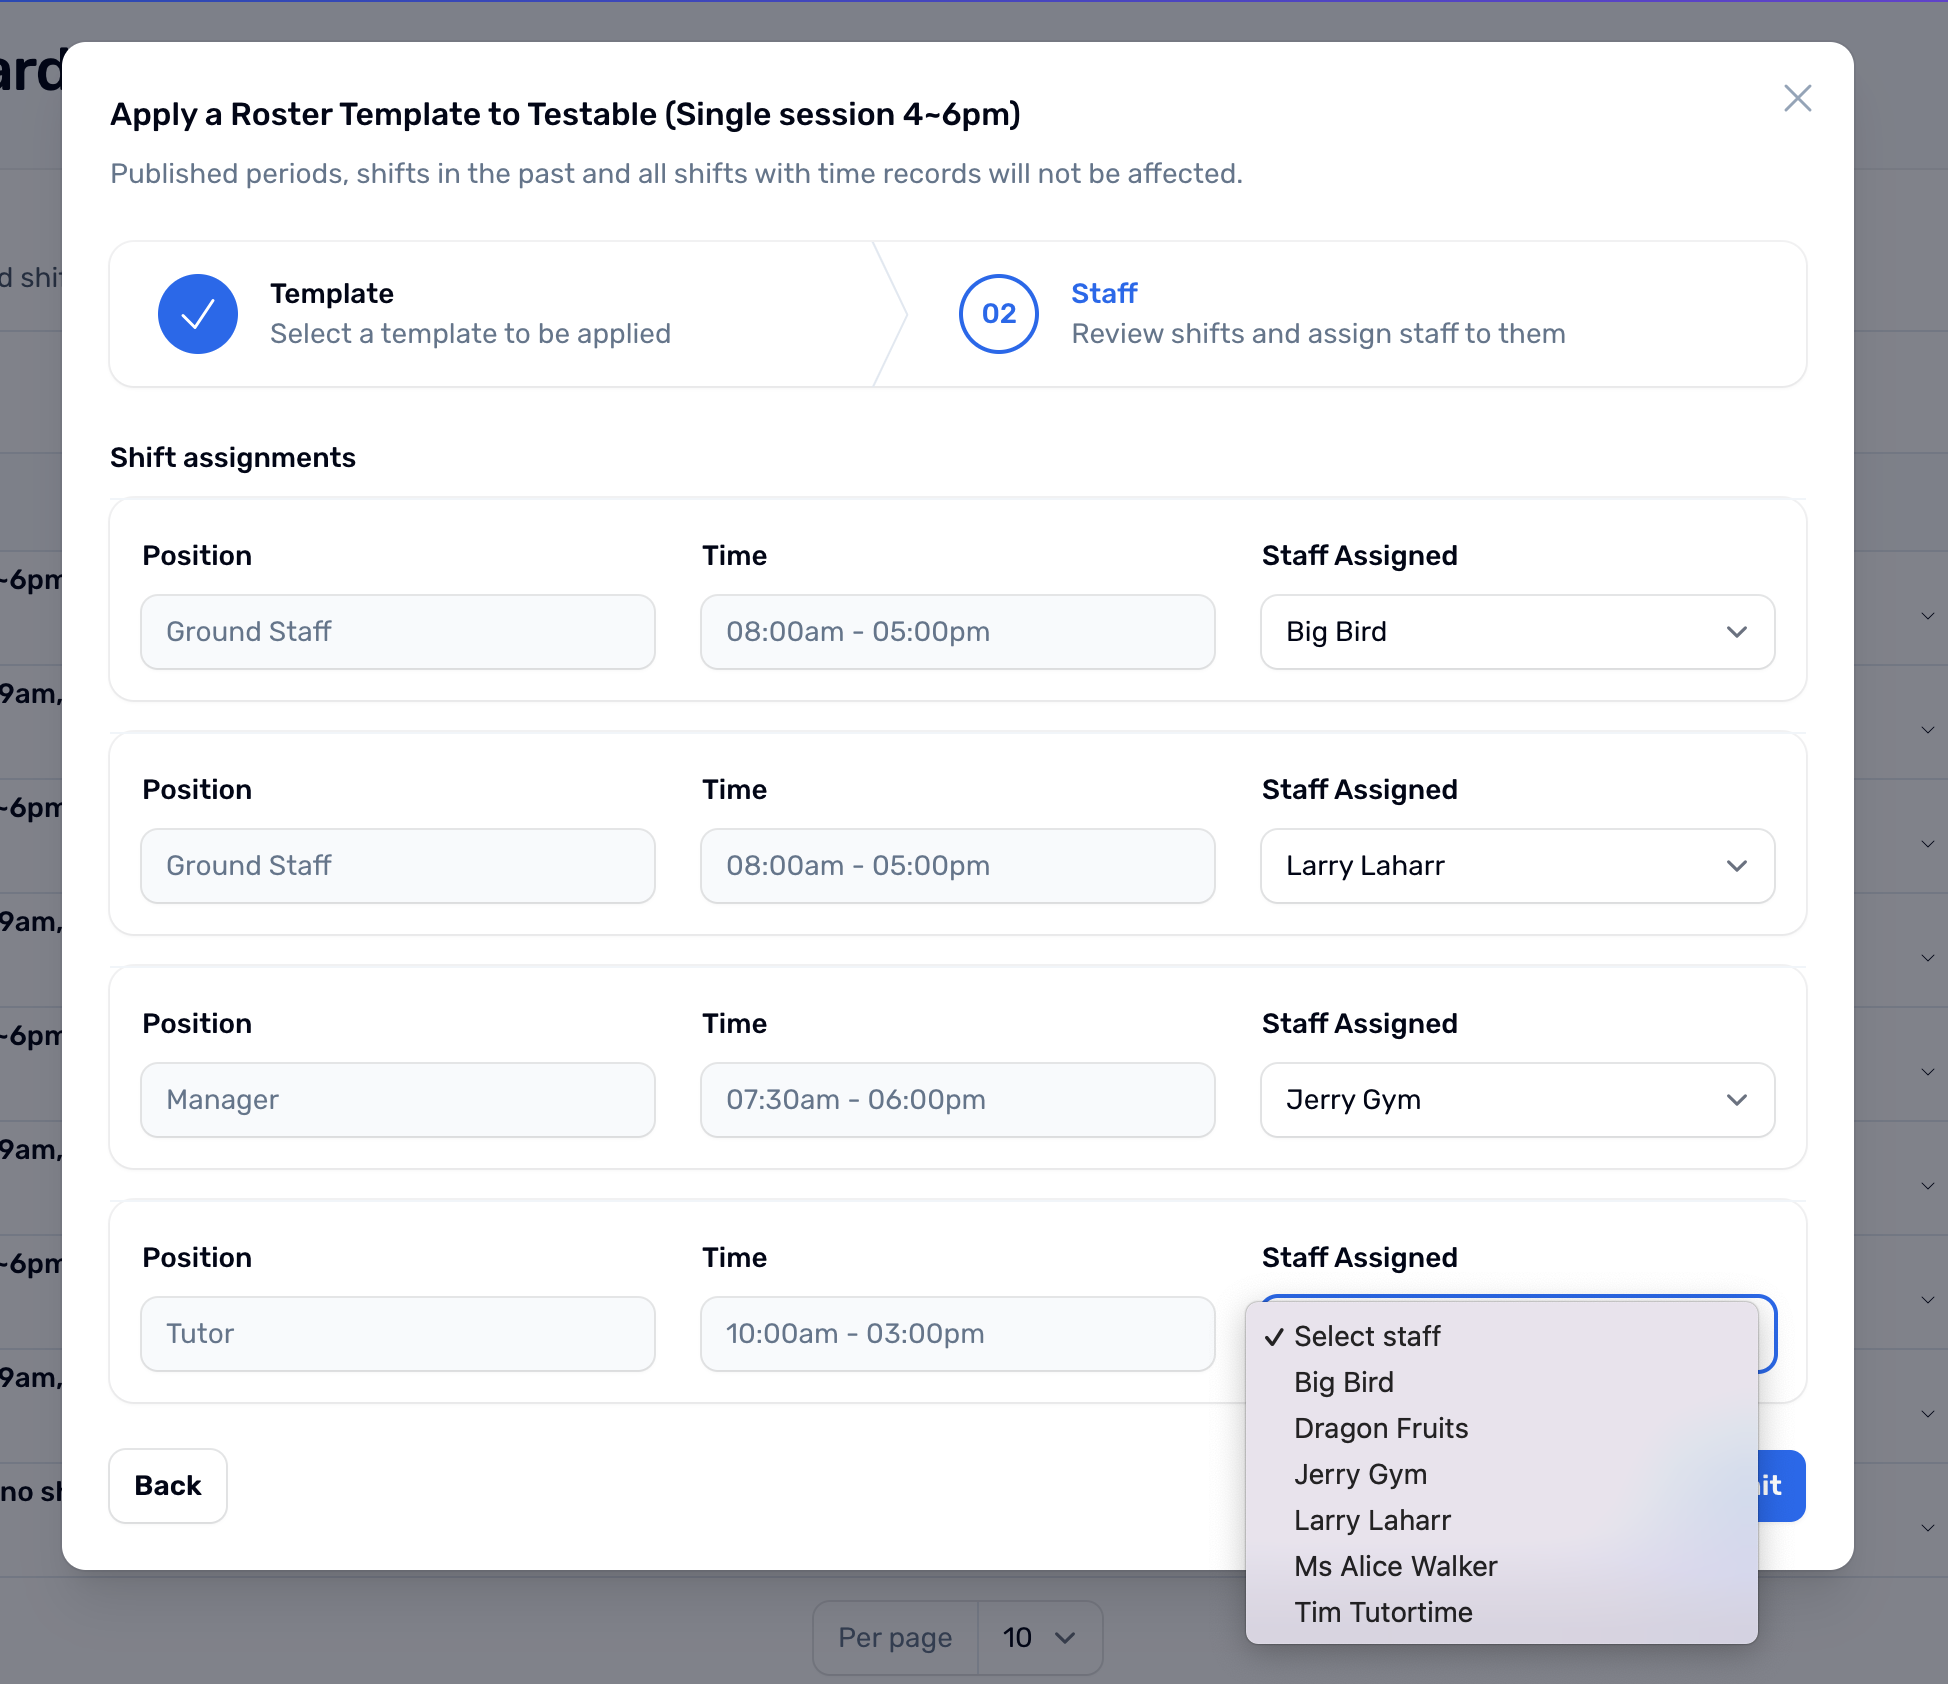
Select Submit to complete assigning shifts.
The roster for this activity is now in a draft state and needs to be published.
Awesome, now you know how to create, edit, delete and apply roster templates.
Last updated