Setting Up Lessons And Classes Activity
Scenarios:
You want to set up Lessons and Classes activity
You run full term fixed day activities
This document assumes the following:
You know the details of your Activity
You know the pricing structure of your Activity
How To Create Lessons And Classes Activity
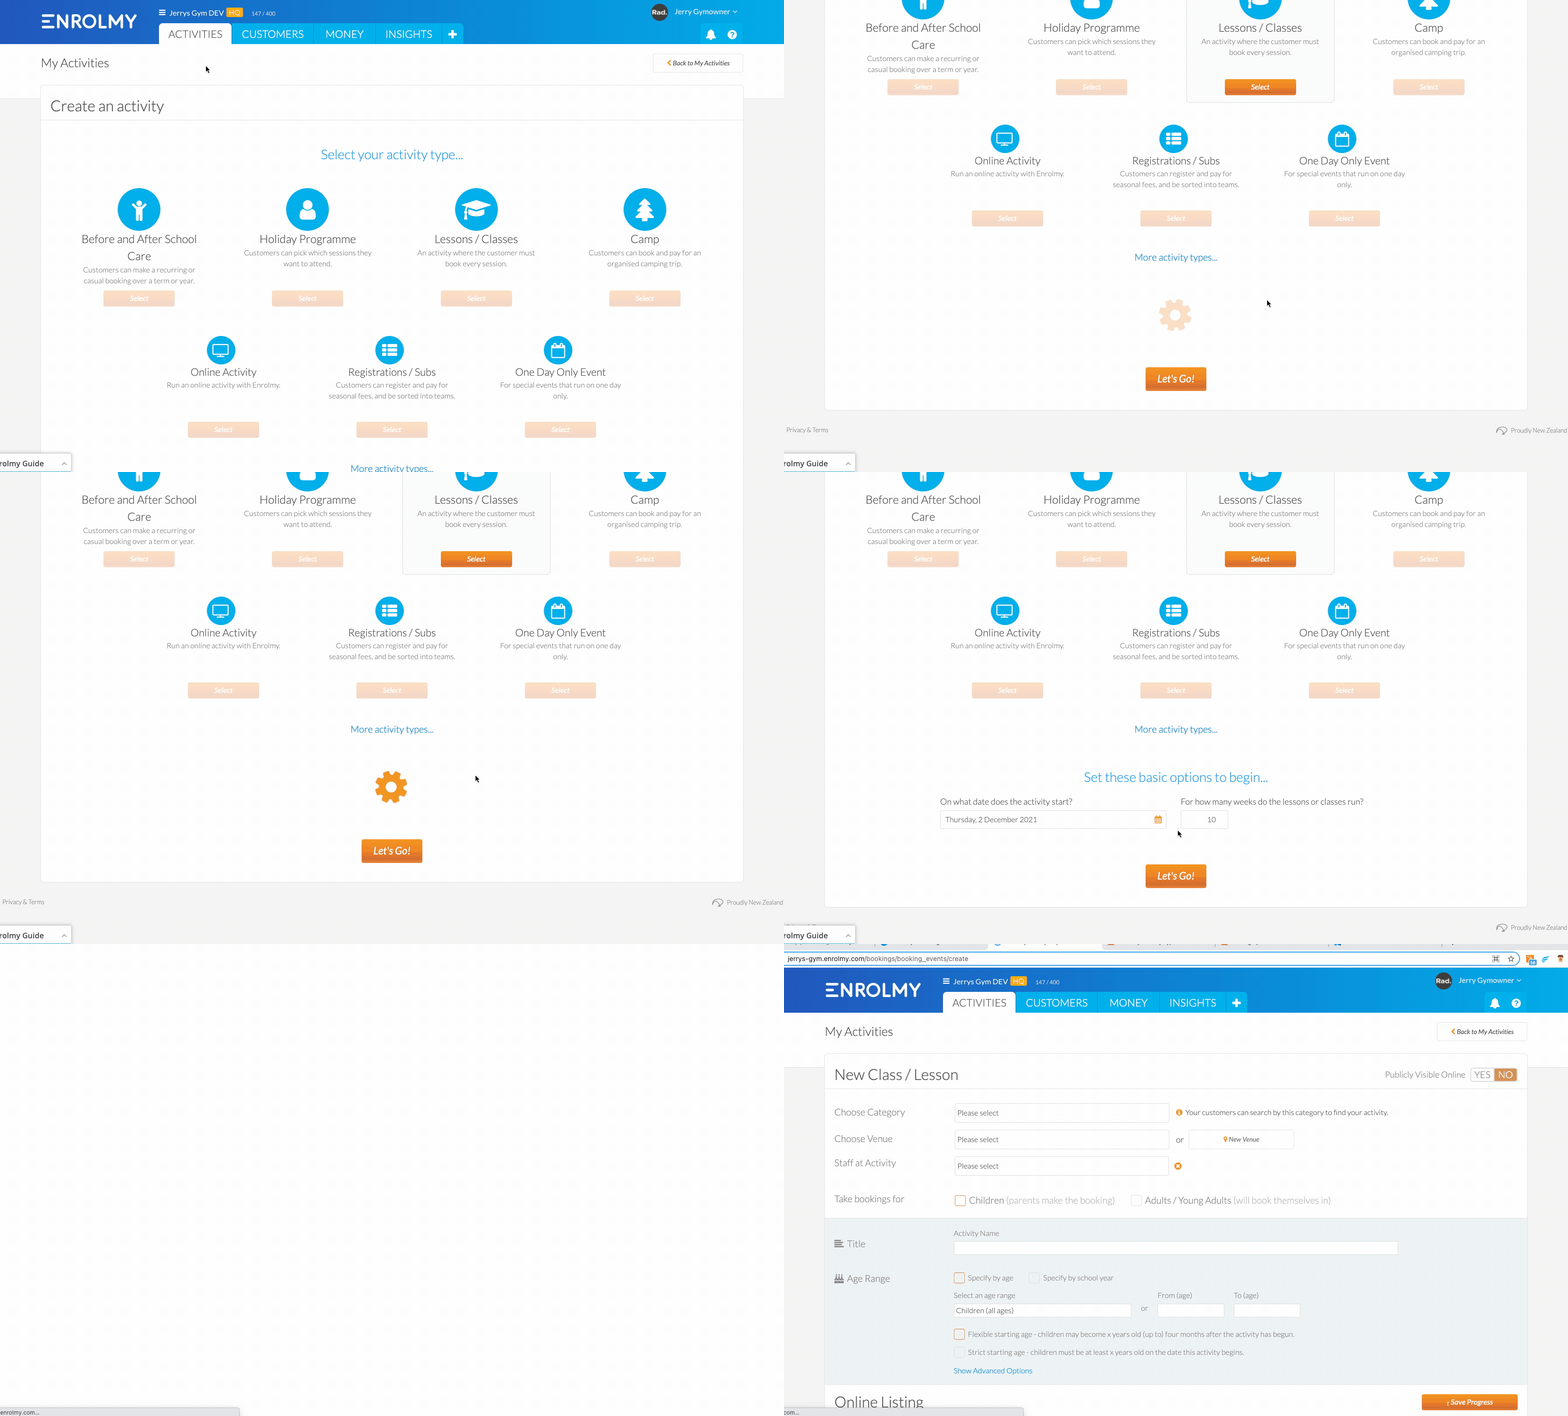
Select Create an Activity from within the Activity tab.
Select the Lessons and Classes type.
Select the start date and how many weeks you will run.
Click the Let’s go! button.
General Settings
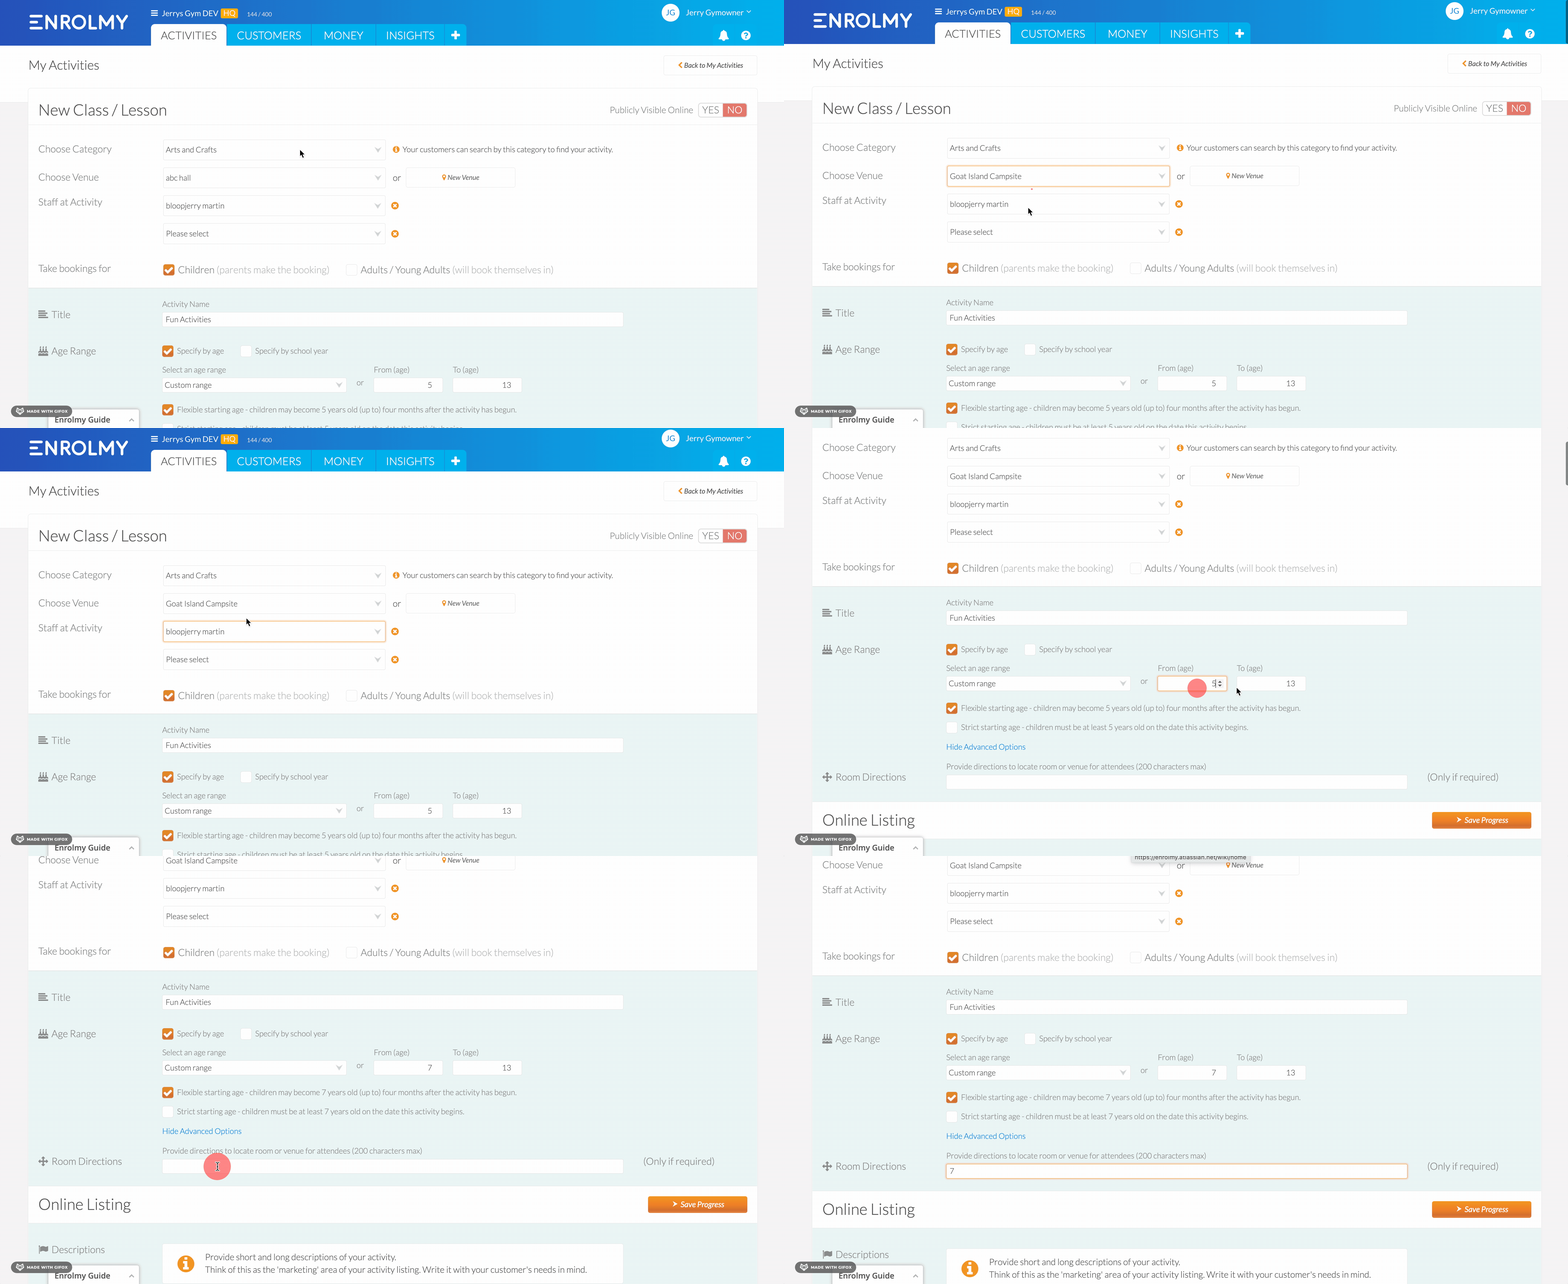
Choose Category
Choose your venue from the second drop-down menu
If your venue is not there, click the Create new venue button to the right.
A new form will populate, where you will fill in the details of your venue.
Once you save this venue, it will appear in the Choose your venue drop-down menu.
Select the staff who will be at the activity from the next drop-down menu.
Select your type of attendees:
Children (their parents will make the bookings) OR
Adults/young adults (will make bookings themselves)
Choose activity name
Add Room directions (if needed)
Online Listing Details
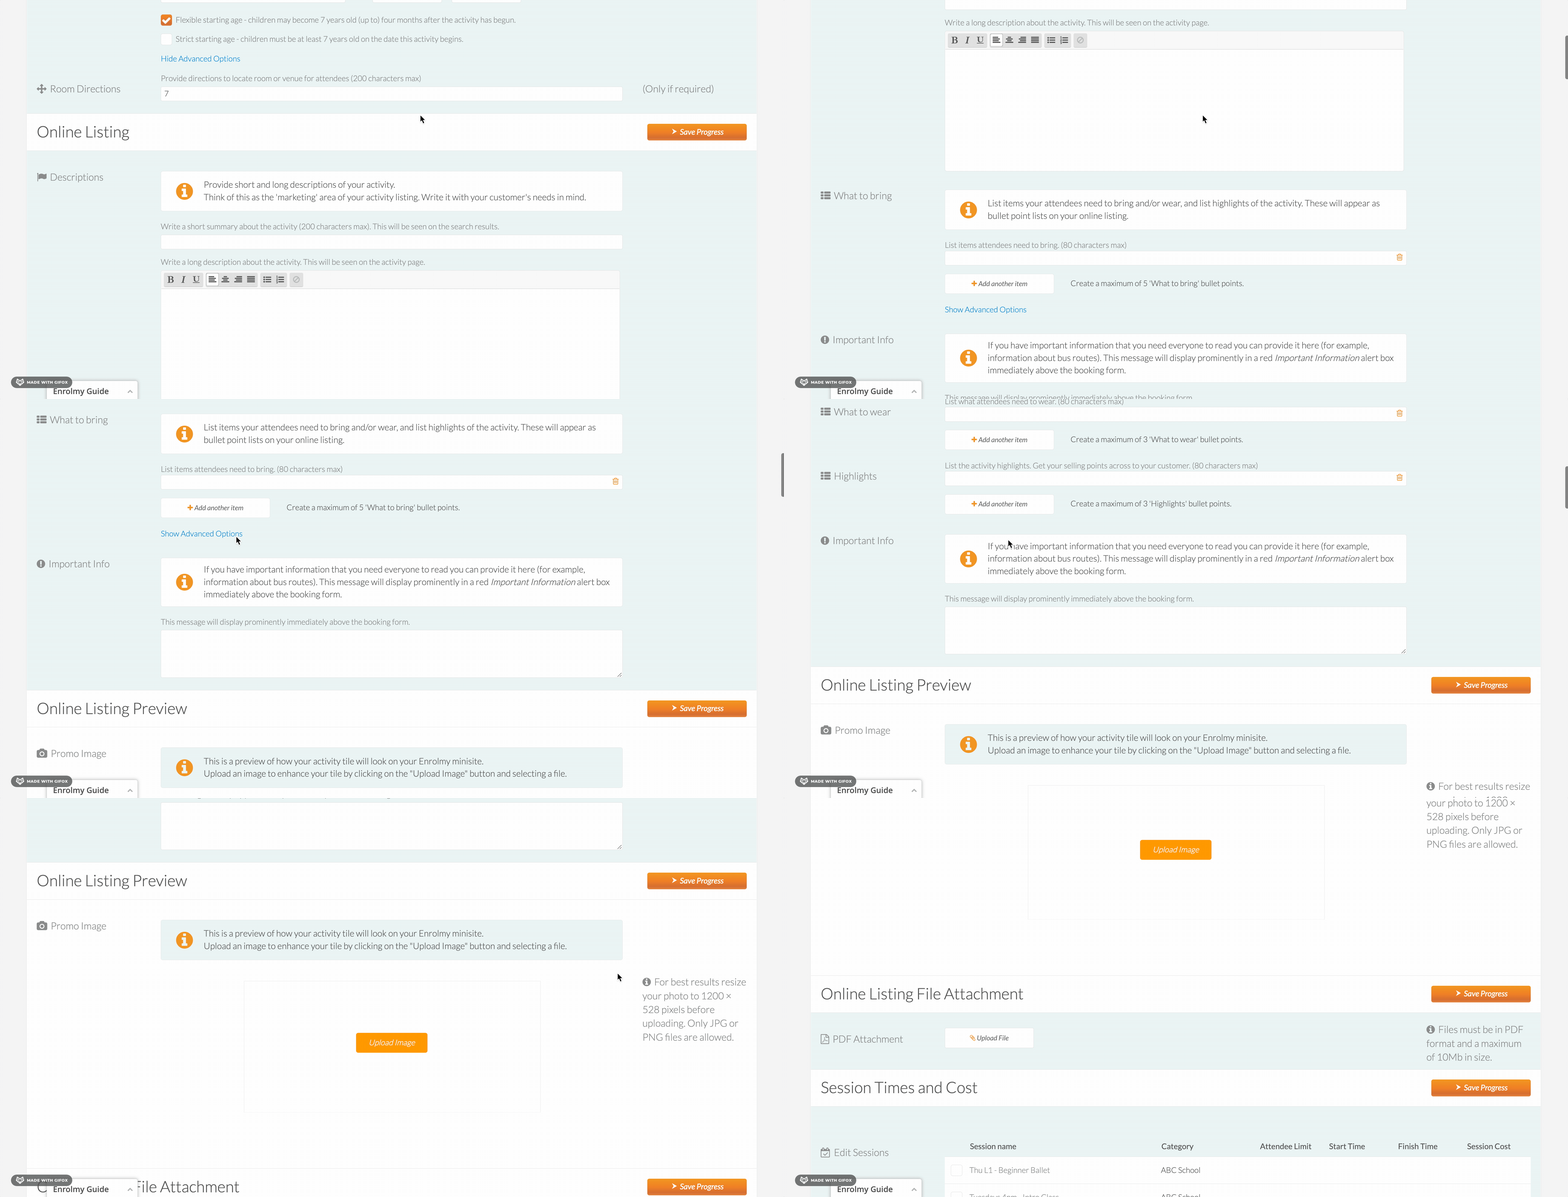
Write a short summary of the activity that will be seen on the search results.
Write a long description of the activity that will be seen on the activity page.
List items your attendees need to bring and/or wear, and list highlights of the activity. These will appear as bullet-point lists on your online listing.
If you have important information that you need everyone to read, you can provide it here (for example, information about bus routes). This message will display in a red Important Information alert box immediately above the booking form.
Upload a Promo Image to enhance your tile.
Attach any flyers in a form of pdf.
Session Times and Cost
You can select only one session for this activity type
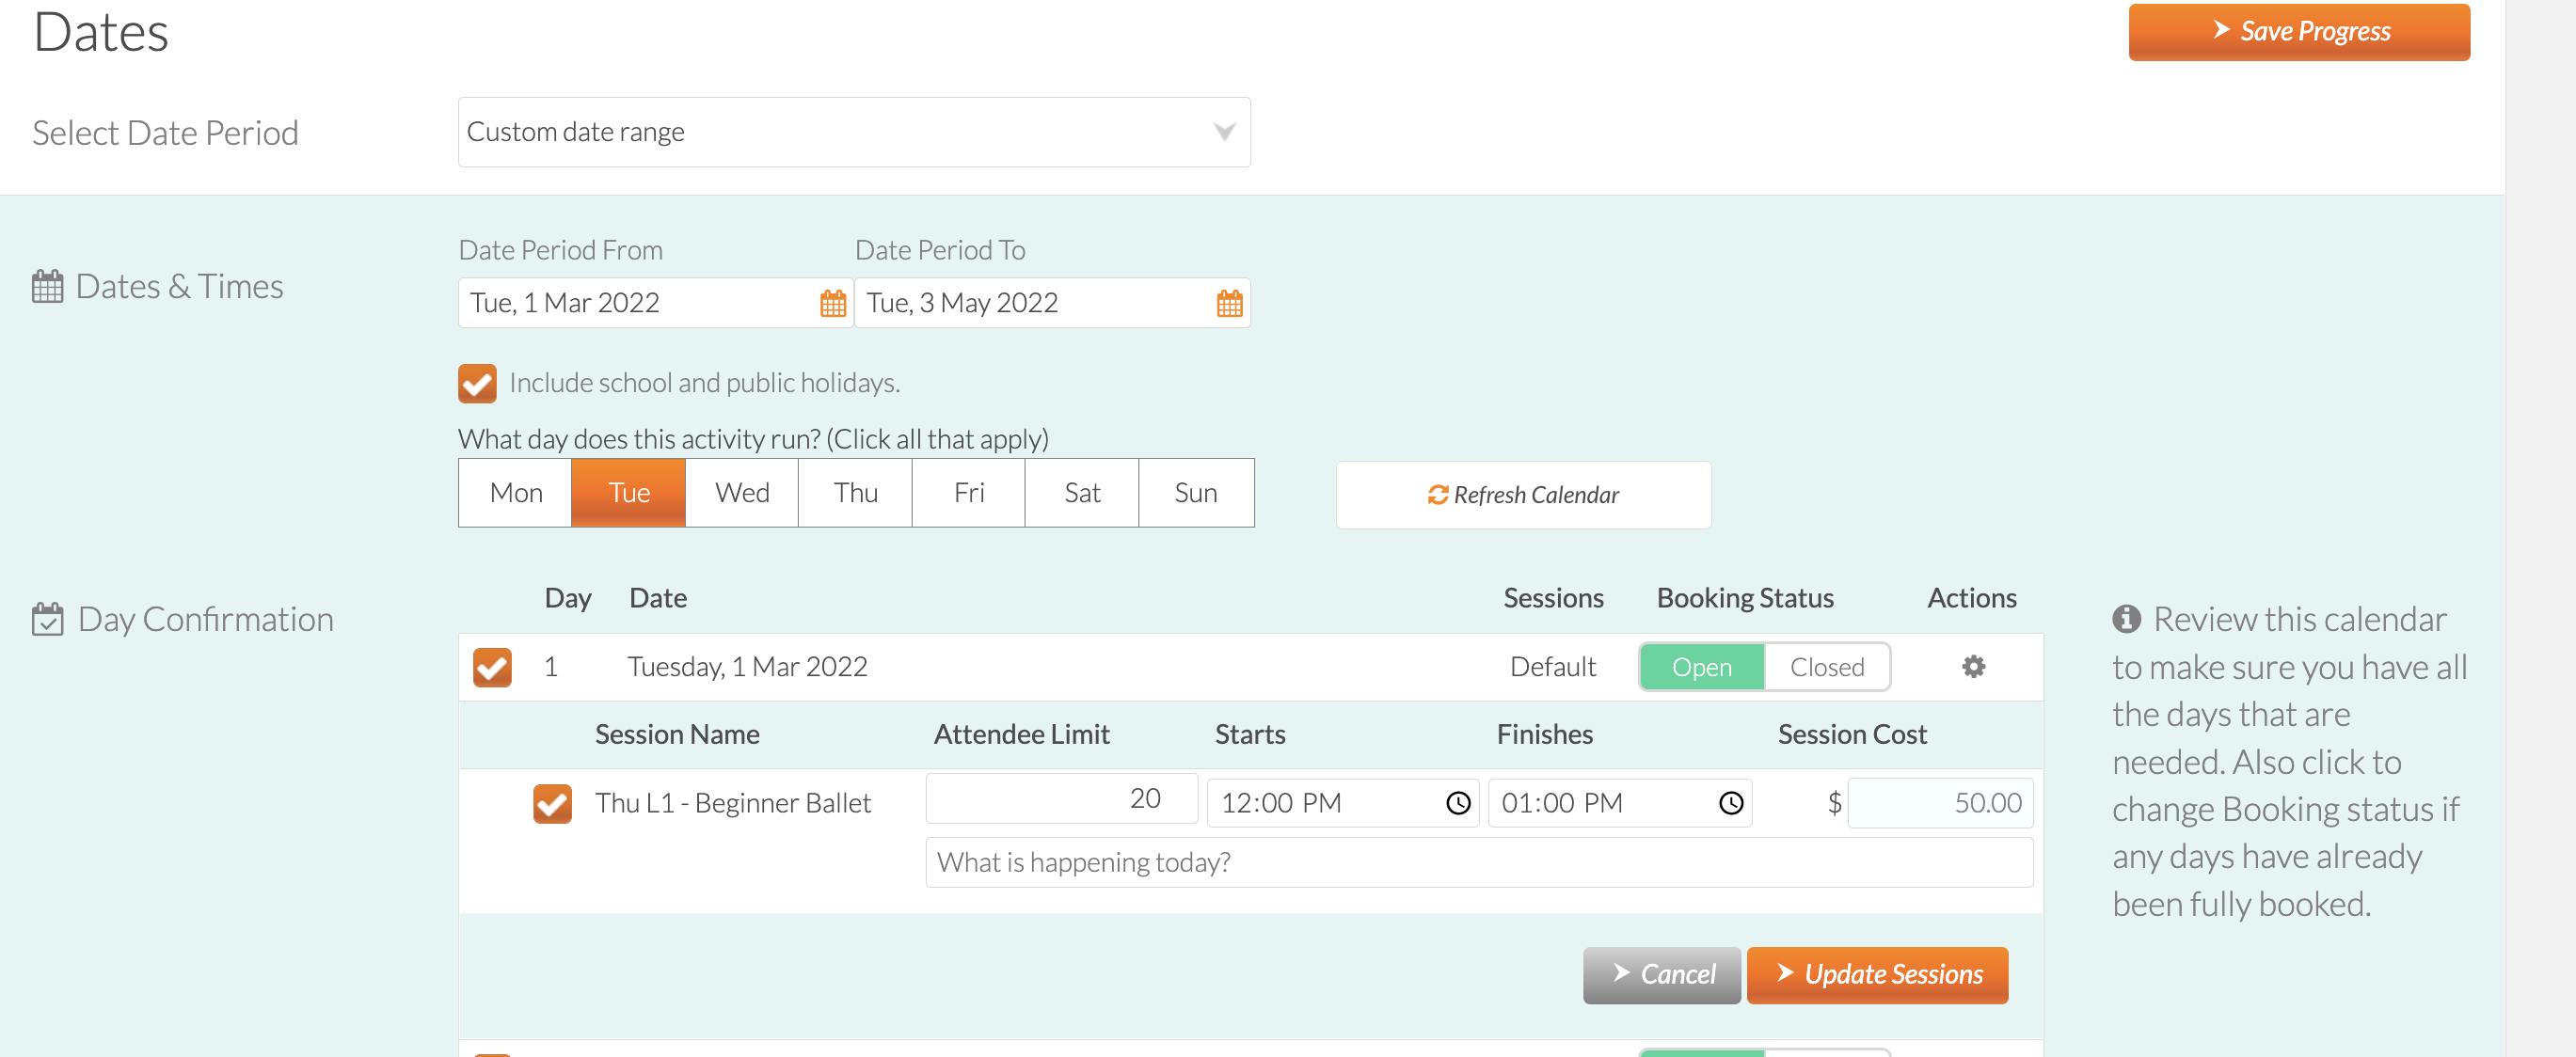
Choose Attendee limit, Start & Finish times and Session Cost

Dates
Select dates when the activity will be running
Amend Attendee limit, Start & Finish times and Session Cost - if required
Additional Items
You are able to sell additional items and make them compulsory which means the item is auto-selected on the booking form and can not be un-selected. You can choose to require the child’s name or alternatively ask the customer how many of these items (quantity) they would like.
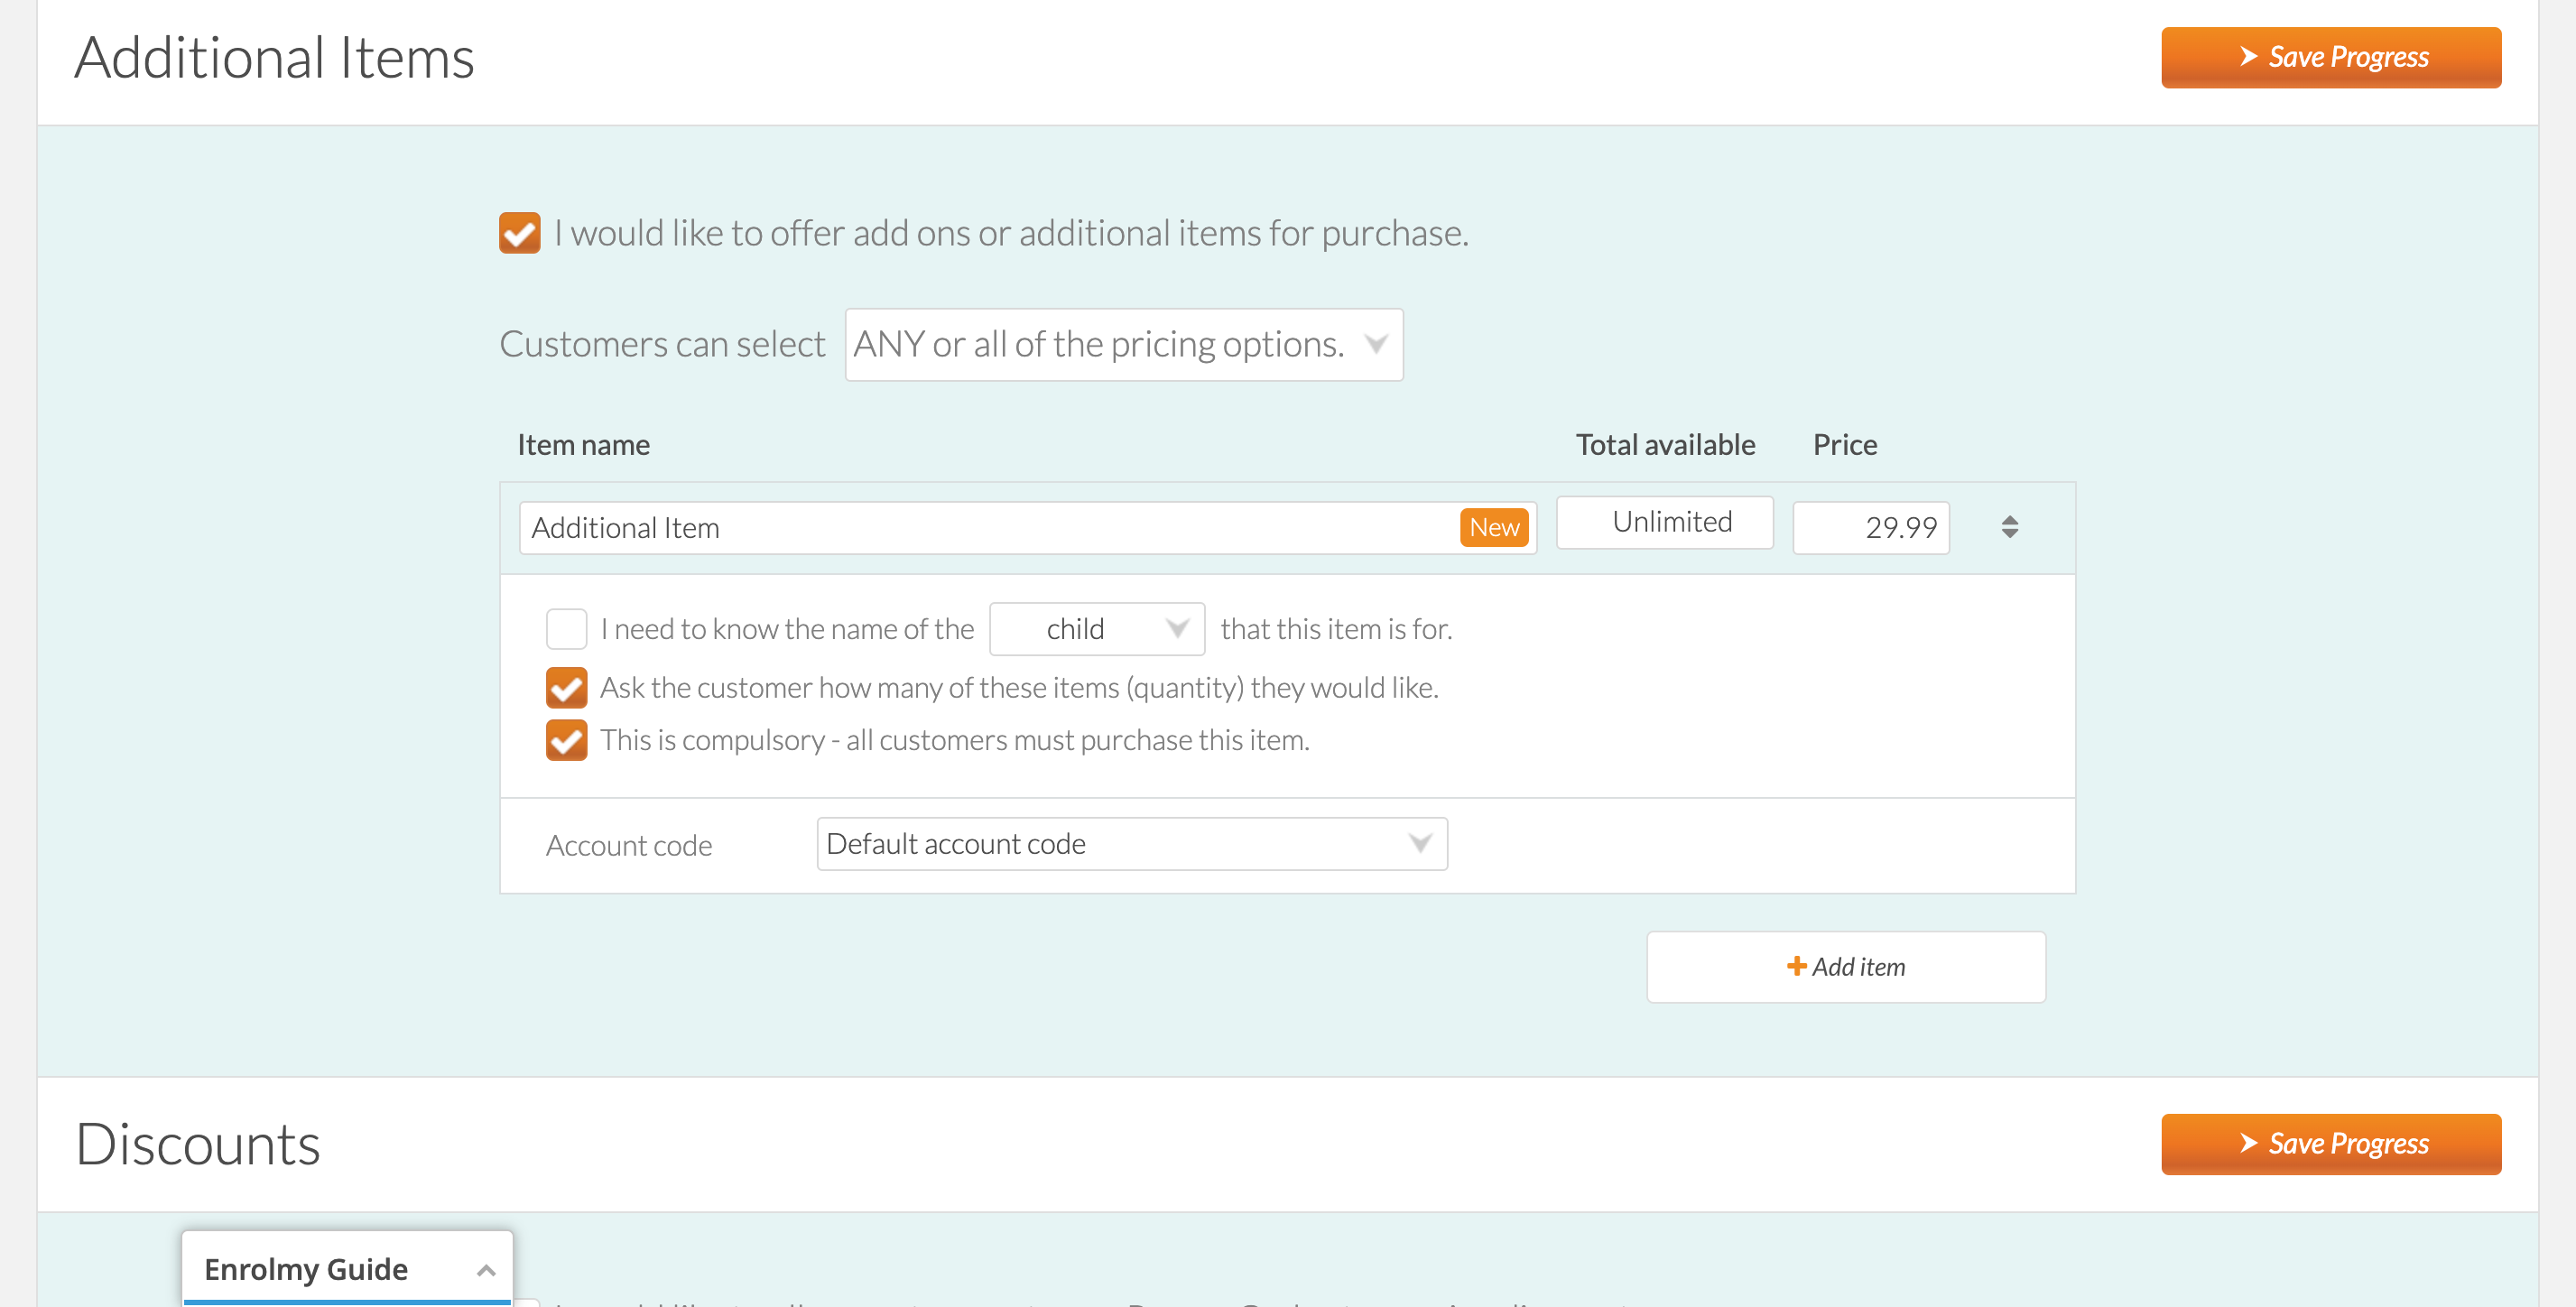
Please remember to assign Account Code if your Enrolmy account is integrated with Xero.
You might find this help guide useful: https://helpcentre.enrolmy.com/entkb/tracking-additional-items-for-classes-and-lessons
Discounts
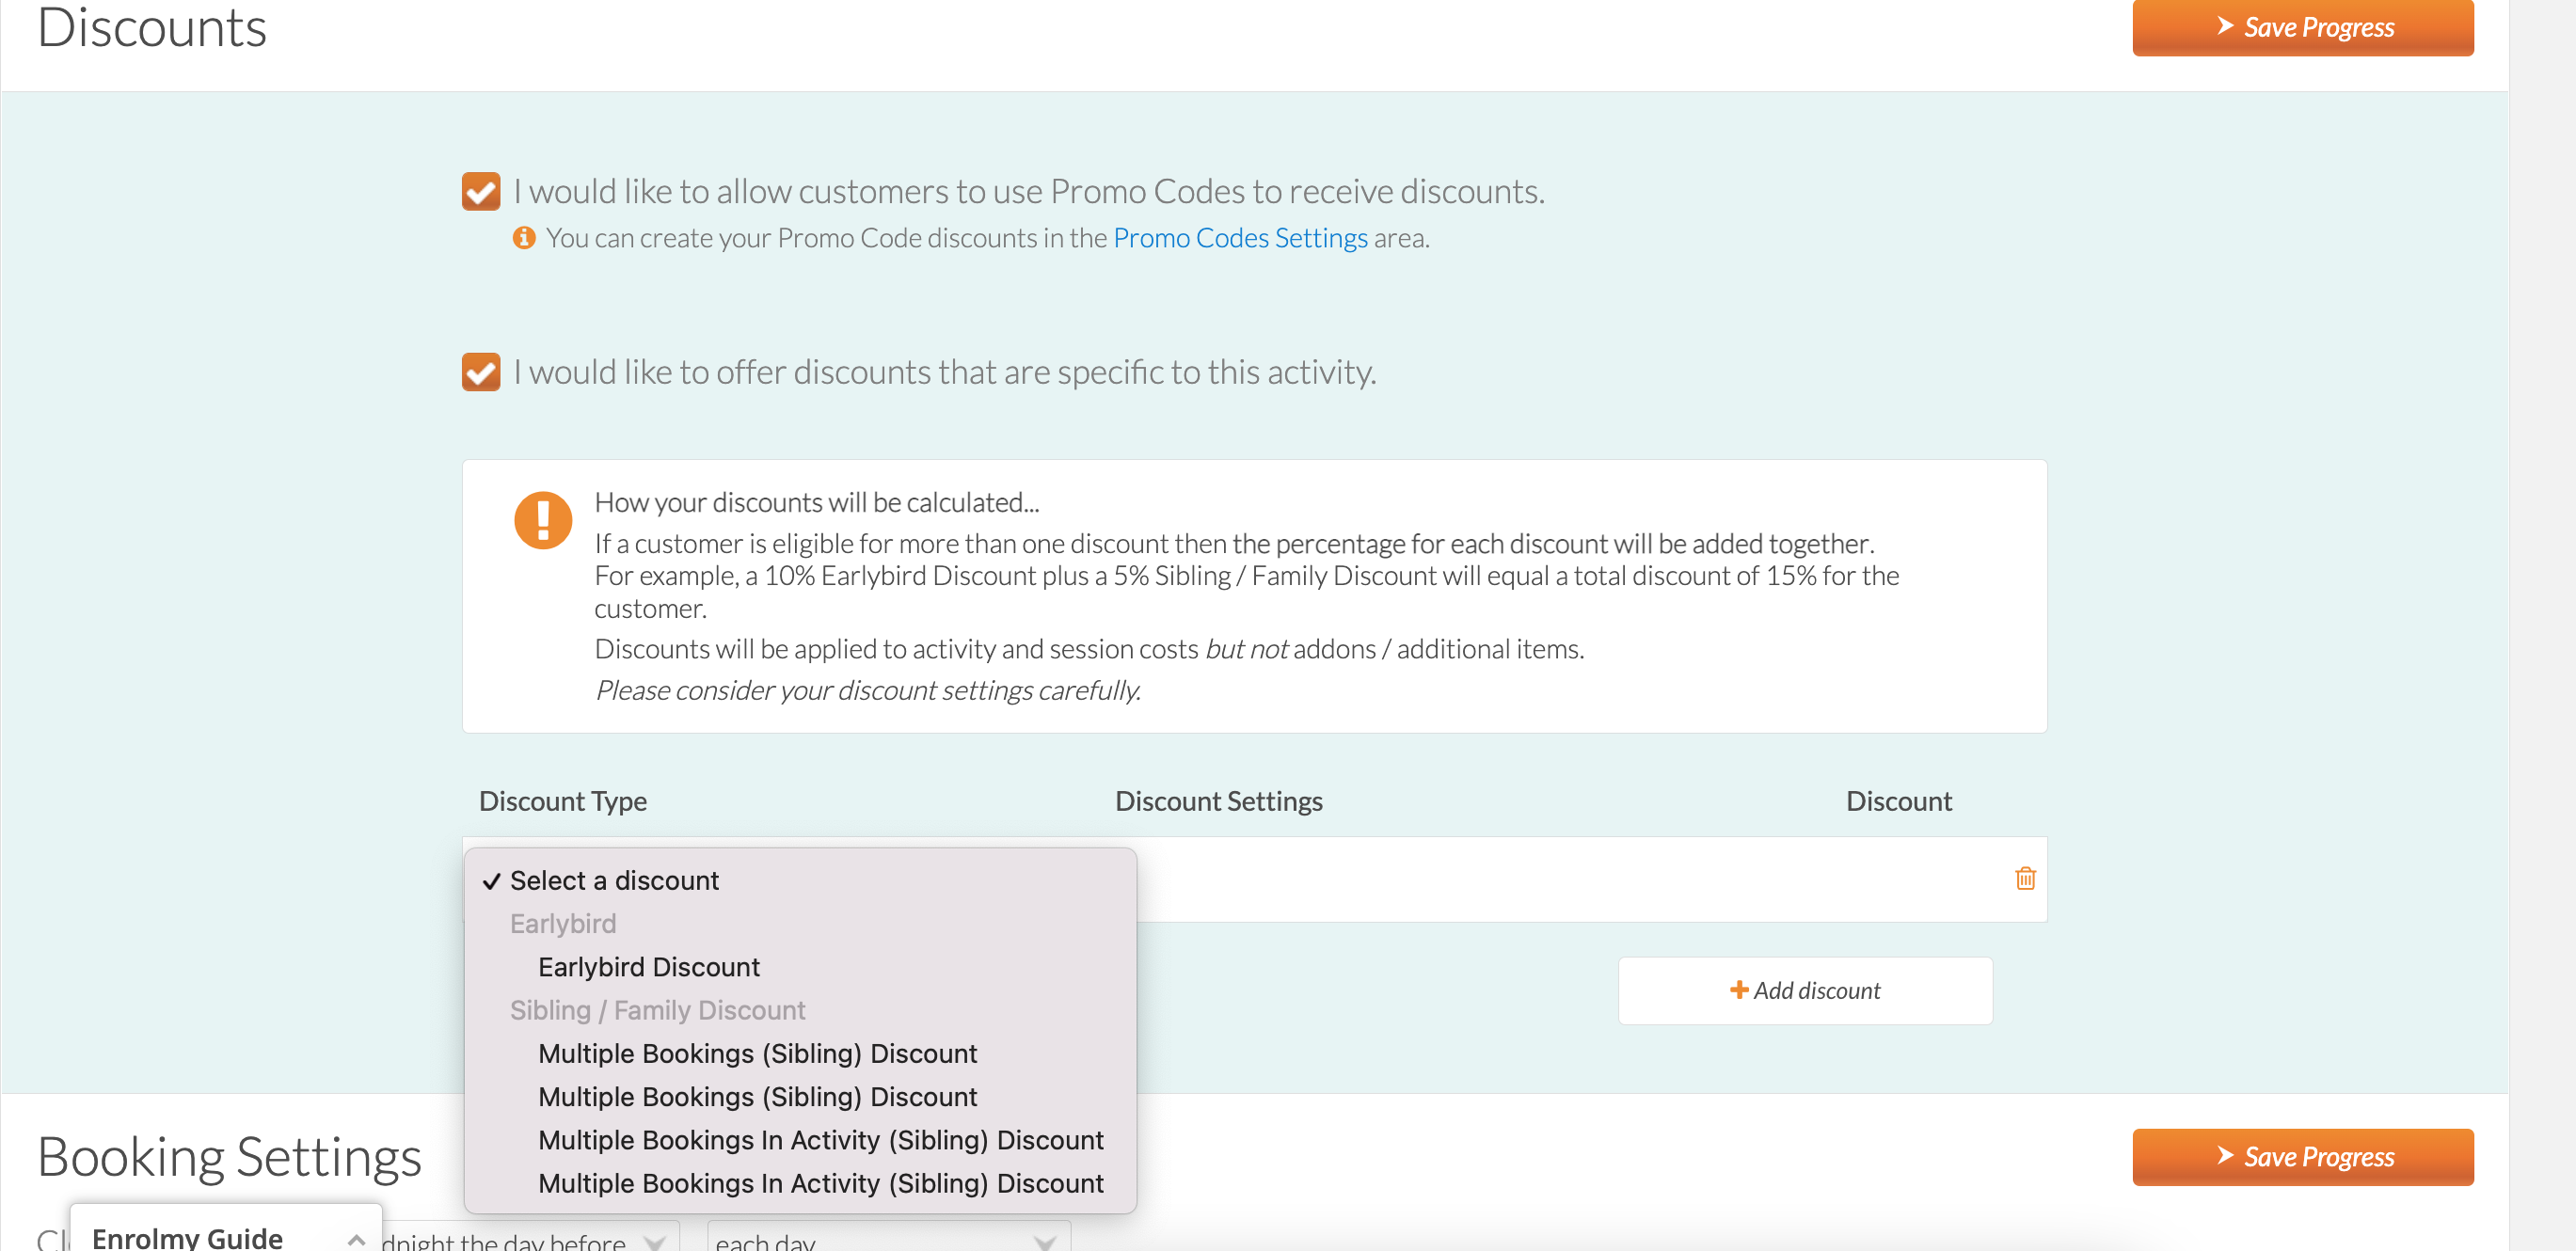
You can offer any of the discount types available. Please see here for more information:
Booking Settings
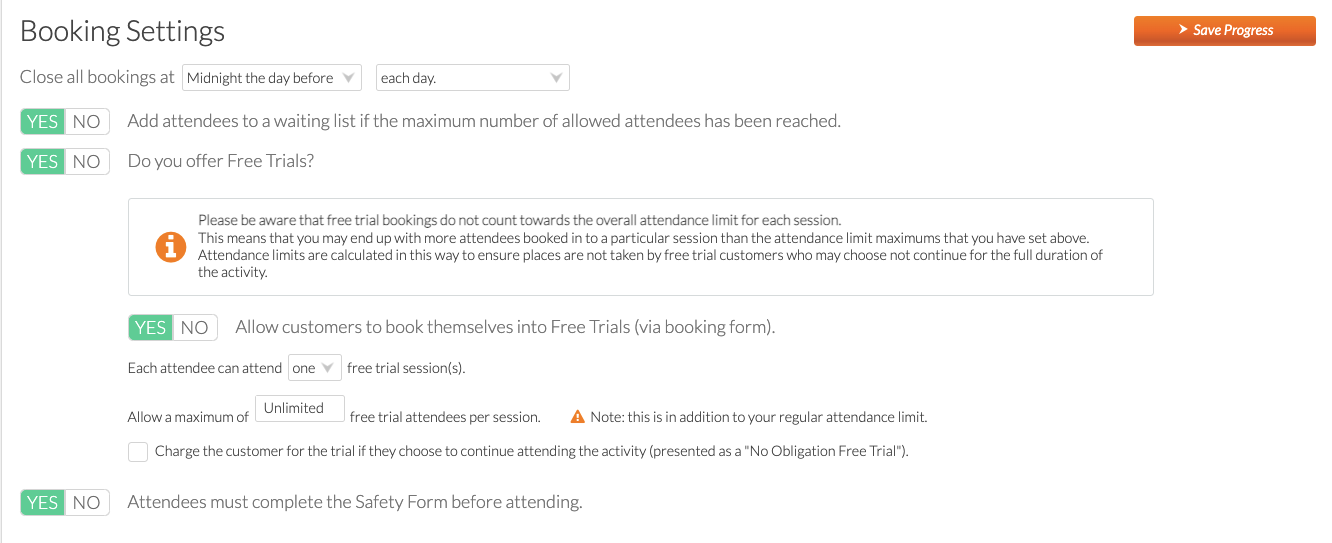
You can specify when you would like your bookings to close.
You can choose to add attendees to a waiting list if the maximum number of allowed attendees has been reached
You can choose to offer Free Trials. Please read more about Free Trials here: How To Setup Free Trials
Please refer to this help guide on how to Convert your Free Trial Booking: Convert Free Trial into Full Term Booking
If you select Yes for "Attendees must complete Safety Form before attending" then the attendee (or parent) will receive reminders for incomplete Safety forms.
Invoice Settings
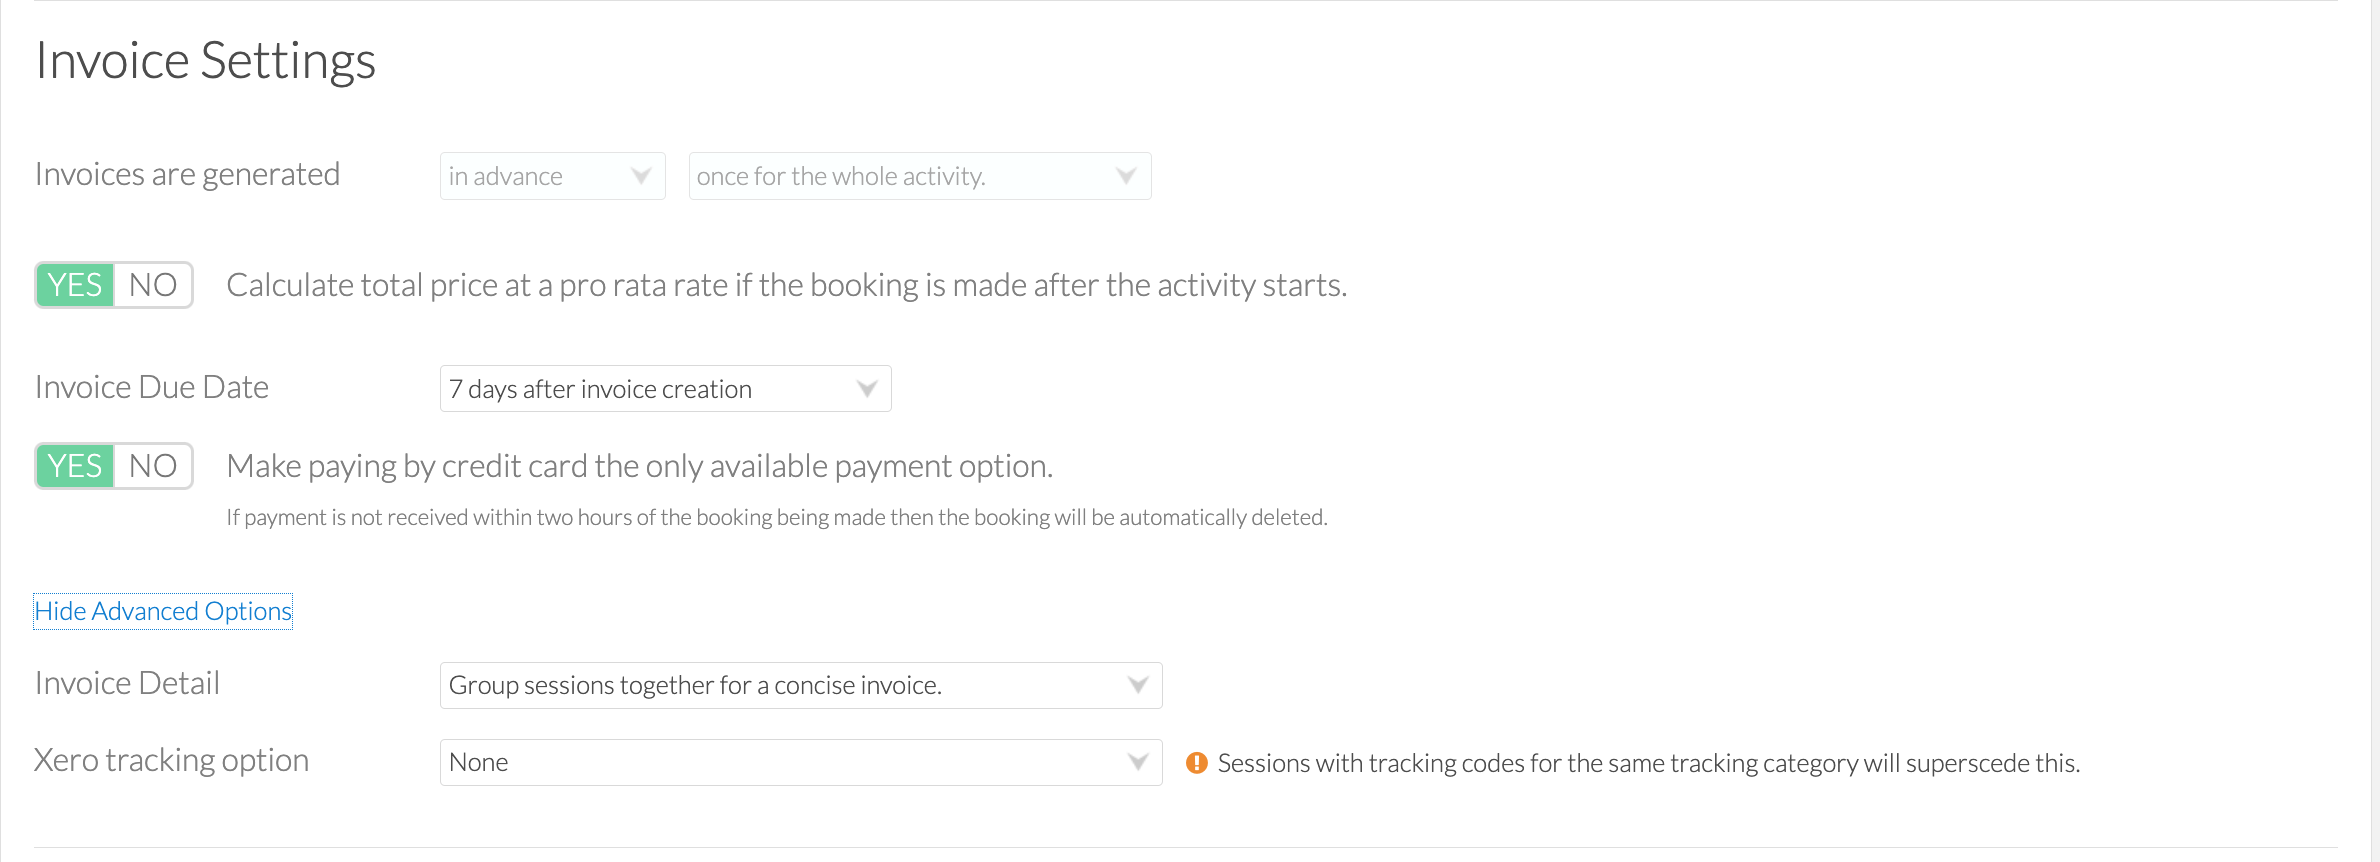
Invoices are generated in advance for the whole activity.
Choose whether you will use a pro-rata rate.
Choose your invoice due date
Choose if you would like to make credit card the only payment option.
Choose your invoice and Xero tracking options.
Subsidy Settings
Enable or disable OSCAR subsidies for this activity

Online Publishing Settings
To enable customers to use the booking form to make bookings ensure the booking form is not hidden by selecting No
To allow bookings or inquiries coming through for this activity, click Yes
To publish the activity online and enable customers to find your minisite, click Yes

Awesome! You now know how to set up your Lessons and Classes Activities.
Last updated:
